![[Logo]](/img/hat.gif)
Sky-Watcher Star Adventurer Mount
I purchased a Sky-Watcher Star Adventurer (henceforth, "SA") mount from Focus Scientific of Ottawa, CA, in the last few days of August 2014, and had them ship it to me in the US. It was not in stock at the time, but they did a great job of keeping in touch with me and letting me know what was going on. The mount finally arrived toward the end of October 2014. All indications are that there is a lot of interest in this mount, and it does regularly sell out from vendors everywhere.
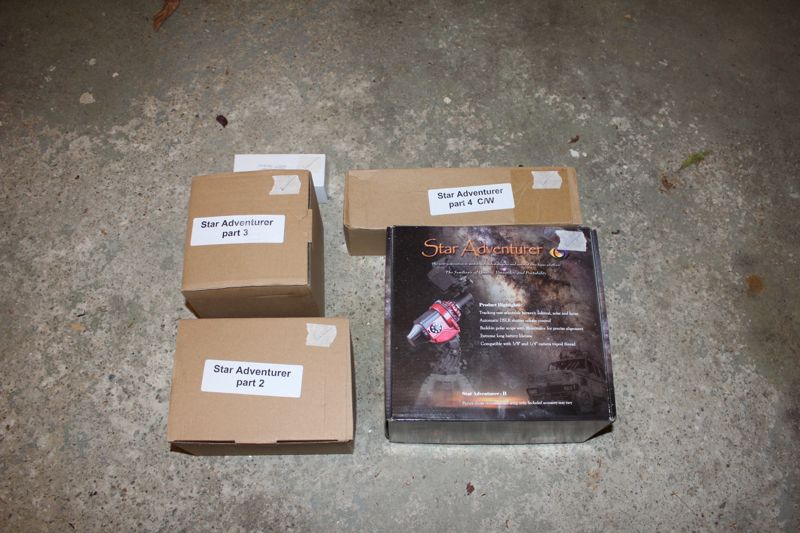
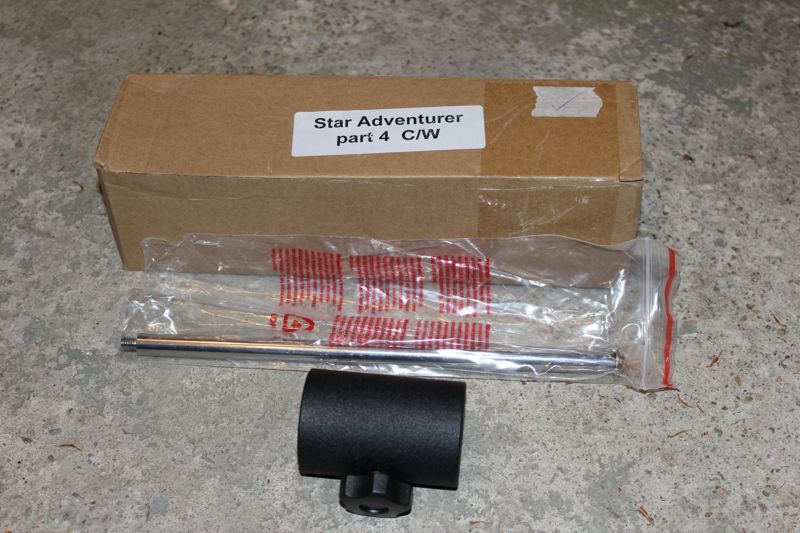
I purchased the Astrophotography Bundle, at a cost of $489.99 CA. This bundle comes in 5 boxes and includes:
- the mount
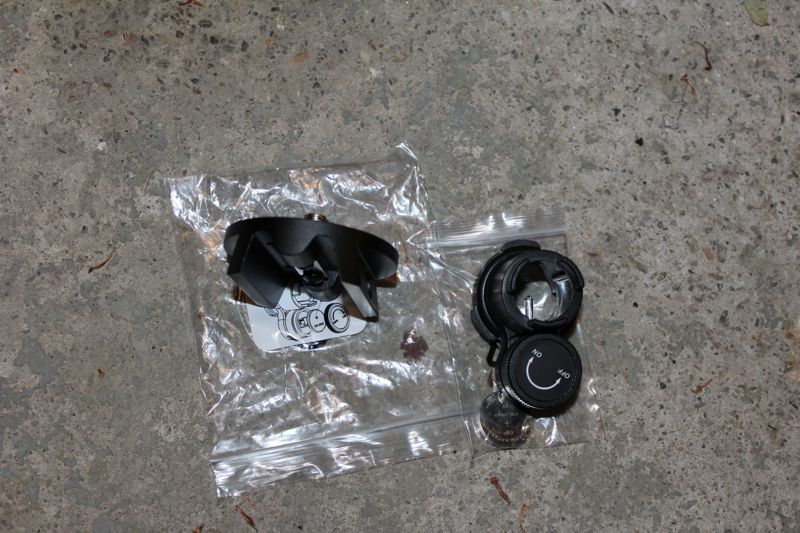
- a ball head adapter and polar scope illuminator
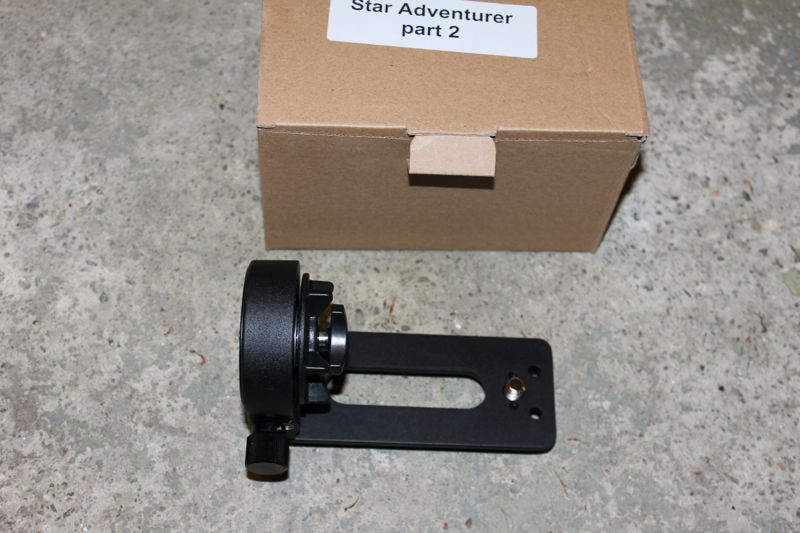
- an L bracket adapter
- a counterweight
- an equatorial wedge
- and a shutter release cable
IMPORTANT: There are significant differences between the astrophotography bundle offered in Canada (SKU: BD312332) and the bundle offered in the US (SKU: SKWS20510). The US SKU does not include the equatorial wedge, the counterweight, or the ball head adapter. It instead puts the SA on a ball head mount - to my mind, making it almost impossible to obtain a good polar alignment. The wedge, the counterweight and the ball head adapter may be ordered separately at additional cost, so be careful in ordering to know exactly what you're getting.
There are several options for shutter release cable. You must select the correct option for your camera when you place the order. I have a Canon EOS 60D, so I selected the correct cable for that.
It is important to note that none of the SA bundles comes with a tripod. That must be purchased separately; so if you're looking at this to be a low-cost mount, you'll need to either have a tripod already which you can use with this mount, or you'll need to get one. My intent in purchasing this mount was to have an easily portable mount which might even fit in my carry-on baggage, so I would have the option to image when I'm traveling if I so desired. As such, I purchased a Manfrotto 057c3 tripod. I selected it because it collapses to a size that will fit in my baggage, because it was light, and because it had a carrying capacity of 39.68 pounds (that's 18 kg for you metric heathens). The SA has a carrying capacity of 11 pounds (5 kg)... but you can remove the counterweight and add more equipment on the other side, which I figured could double the capacity to 22 pounds (10 kg) if you balance it properly. The mount itself weighs something, so add in a fudge factor for that, and make sure the tripod you get can deal with that weight.
The Good
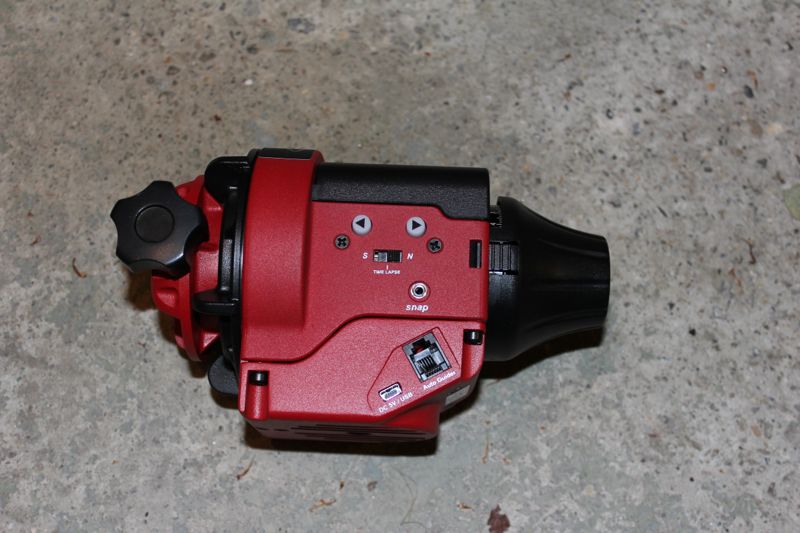
This mount is virtually silent. If the beeping and drive train noises of other mounts have you worried about waking up the neighbors, that will not be a problem with the SA. It makes so little noise, it's easy to forget to turn it off at the end of the night - or whether you've turned it on at the start. I have, on more than one occasion, started my imaging session, only to say, "Why am I getting trails? Oh. It might help if I turned the thing on. Hehehe. Whoops." The dial and the RA adjustment buttons do light up when the mount is on, but clearly I was able to overlook this.
The mount can be powered either by 4x AA batteries or by a mini-USB adapter. The specs say that the batteries can keep it going for 72 hours under the right conditions. I can speak personally to them driving it for at least 12 hours. As I mentioned, it's so quiet that you forget it's on. I brought my equipment in at the end of the night and went to bed, only to find my camera upside down in the morning. Nothing hit anything, so it was all good.
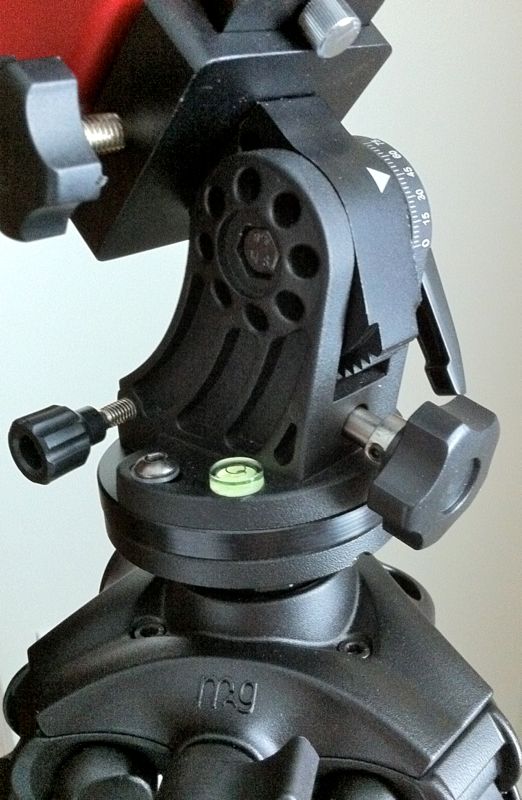
The equatorial wedge is a thing of beauty. Start using it and you'll wonder why other mounts don't approach the problem in the same way - especially if you've ever bent a bolt while trying to do a polar alignment with your equipment already loaded. It is a screw-driven worm gear which can be locked into place.
I've been sticking to 90s exposures since I don't trust my polar alignment just yet, but the SA seems to do a decent job tracking, even without being guided - which, by the way, it can do on a single axis. I haven't tried guiding yet, but as soon as I can work out a battery pack for my guide camera I'll be interested to give it a go.
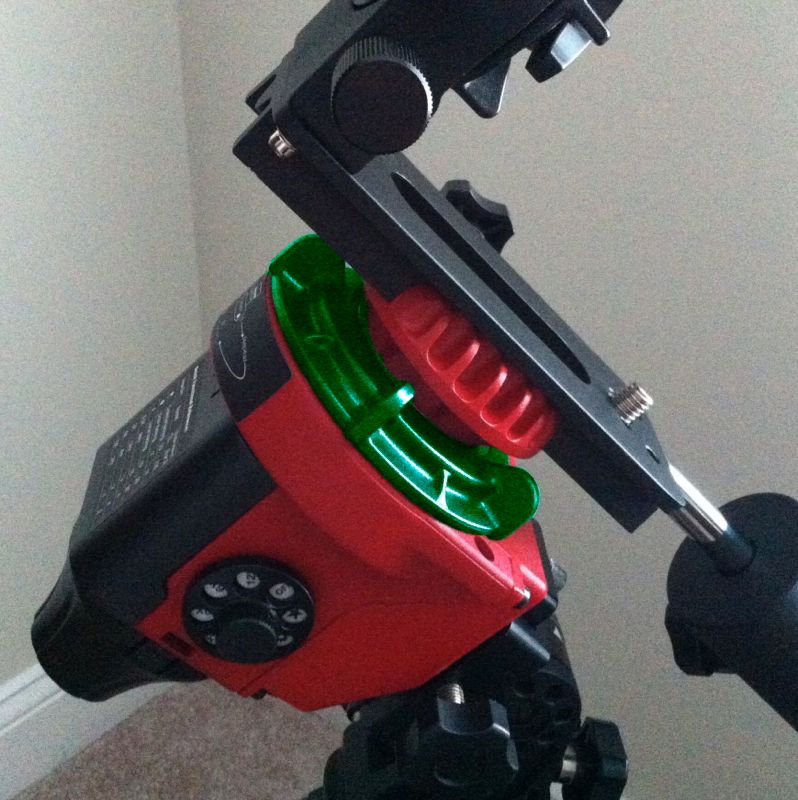
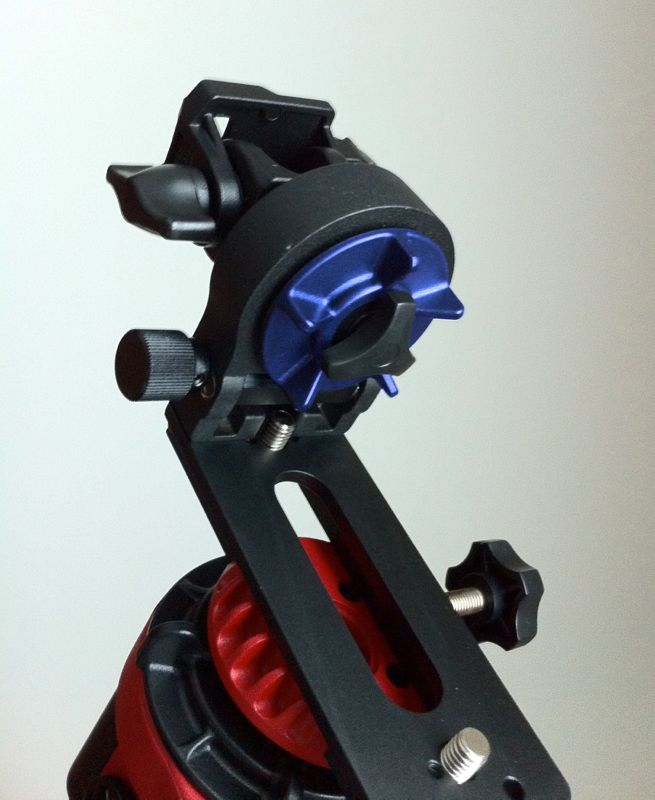
Much about the SA feels like it's been designed so you can make any adjustments you need to make without having to take your mittens off - an important consideration in cold weather. The RA clutch (green) and DEC clutch (blue) are both large wheels with fingerholds extending off them. A knob on the L bracket drives a worm gear, making it easy to fine-tune your DEC positioning. A pair of buttons on the side of the mount near the "S-TL-N" switch give you a motor-driven way to fine-tune your RA positioning.
The Bad
There are some places where a little more attention to detail would have resulted in a vastly improved product. Let's take a look at the battery case, the polar alignment scope, the shutter release control, and the documentation.
The battery case has a cover which provides a quick functional reference. We'll come back to that. In order to change out the batteries, you need to remove the polar alignment scope's cover first, and then you can remove the battery case's cover. The two sides of the battery case have curved edges designed to help hold the batteries in place. Unfortunately, these curved sides can make it difficult to remove the batteries. Some battery packs I've seen in other products have a string or a ribbon to help you pop the batteries out, but the SA does not.
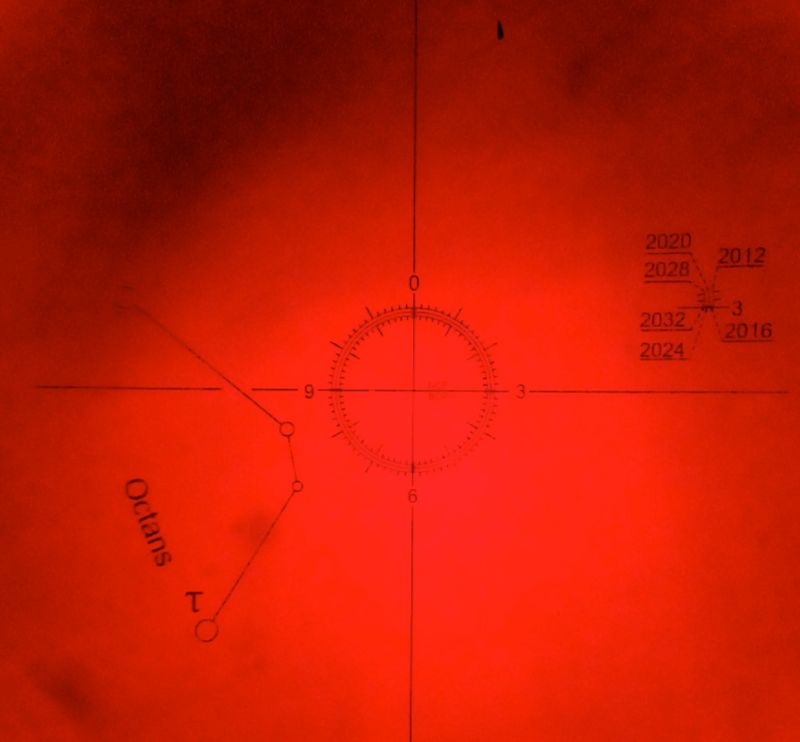
The problem I have with the polar alignment scope is more about the illuminator for it. Ok, to use the polar alignment scope, you need to either print off a Polaris position chart or have software on your phone or tablet that will tell you where Polaris should be relative to the celestial north pole, for your latitude and various times. This is annoying, but not too bad. If you want to use the illuminator, though, you need to remove the L bracket or ball head adapter, along with any equipment you have on the mount, pop the illuminator over the opening for the polar scope, check your alignment, and then load up all your equipment again. I am told that with less sturdy tripods, you will want to double-check your polar alignment after any time you release the RA clutch, making the potential impact of this problem worse. This has not been an issue for me with my tripod, but a number of other reviewers had mentioned it, so it bears repeating.
Here is an iPhone-quality picture of the view through the polar scope, with the illuminator on. Take a look at this, because I want to emphasize how polar alignment is done with this mount. You'll see that there's a place for you to line up 4 stars in Octans. Octans is a southern pseudo-polar constellation, so you won't be able to see those stars from the northern hemisphere. In the north, you will need to use those three concentric circles and an app or chart which tells you what the correct hour angle is. You may notice a key on the right side of the polar alignment image. This key is telling you that, for a given hour angle, you should align Polaris between those three concentric circles as is appropriate for the year you're closest to, as listed in the key.
There isn't a whole lot to say about the mount's shutter release controls, also known as the "Snap" jack. If the cable is plugged in, the mount is trying to take pictures, whether you're ready for it or not. If you're trying to plug the cable in and you hit the metal of the jack a few times before you get the cable into it, your camera will take a picture each time the cable touches the metal. You can only select the shutter speed indirectly, by setting the mount speed (sidereal, solar, lunar, 0.5x, 2x, 6x, 12x) and selecting whether the mount is in "northern equatorial", "southern equatorial", or "time lapse" mode. I have not found a use for the numeric speeds (0.5x, 2x, 6x, 12x), but the shutter speeds in solar (7 or 14 seconds) and lunar (10 or 20 seconds) modes are much longer than I'd have made them. There is some notion that for speeds 2x and faster, the mount will swing between ±30°, but I have not yet had cause to investigate this.
I won't say that the documentation is inaccurate or incomplete, but in trying to read through it I found myself losing interest and wanting to skip sections. This mount is at a price point where it could easily become very popular as a "first mount", for people who are just getting started with the hobby. As such, engaging documentation ought to have been a "must have" for it.
Other Notes
I have not yet gone through the polar alignment scope calibration procedure. Nonetheless, I have not seen significant trailing in 90s exposures.
There is no provision I've found for doing PEC.
Sample Images
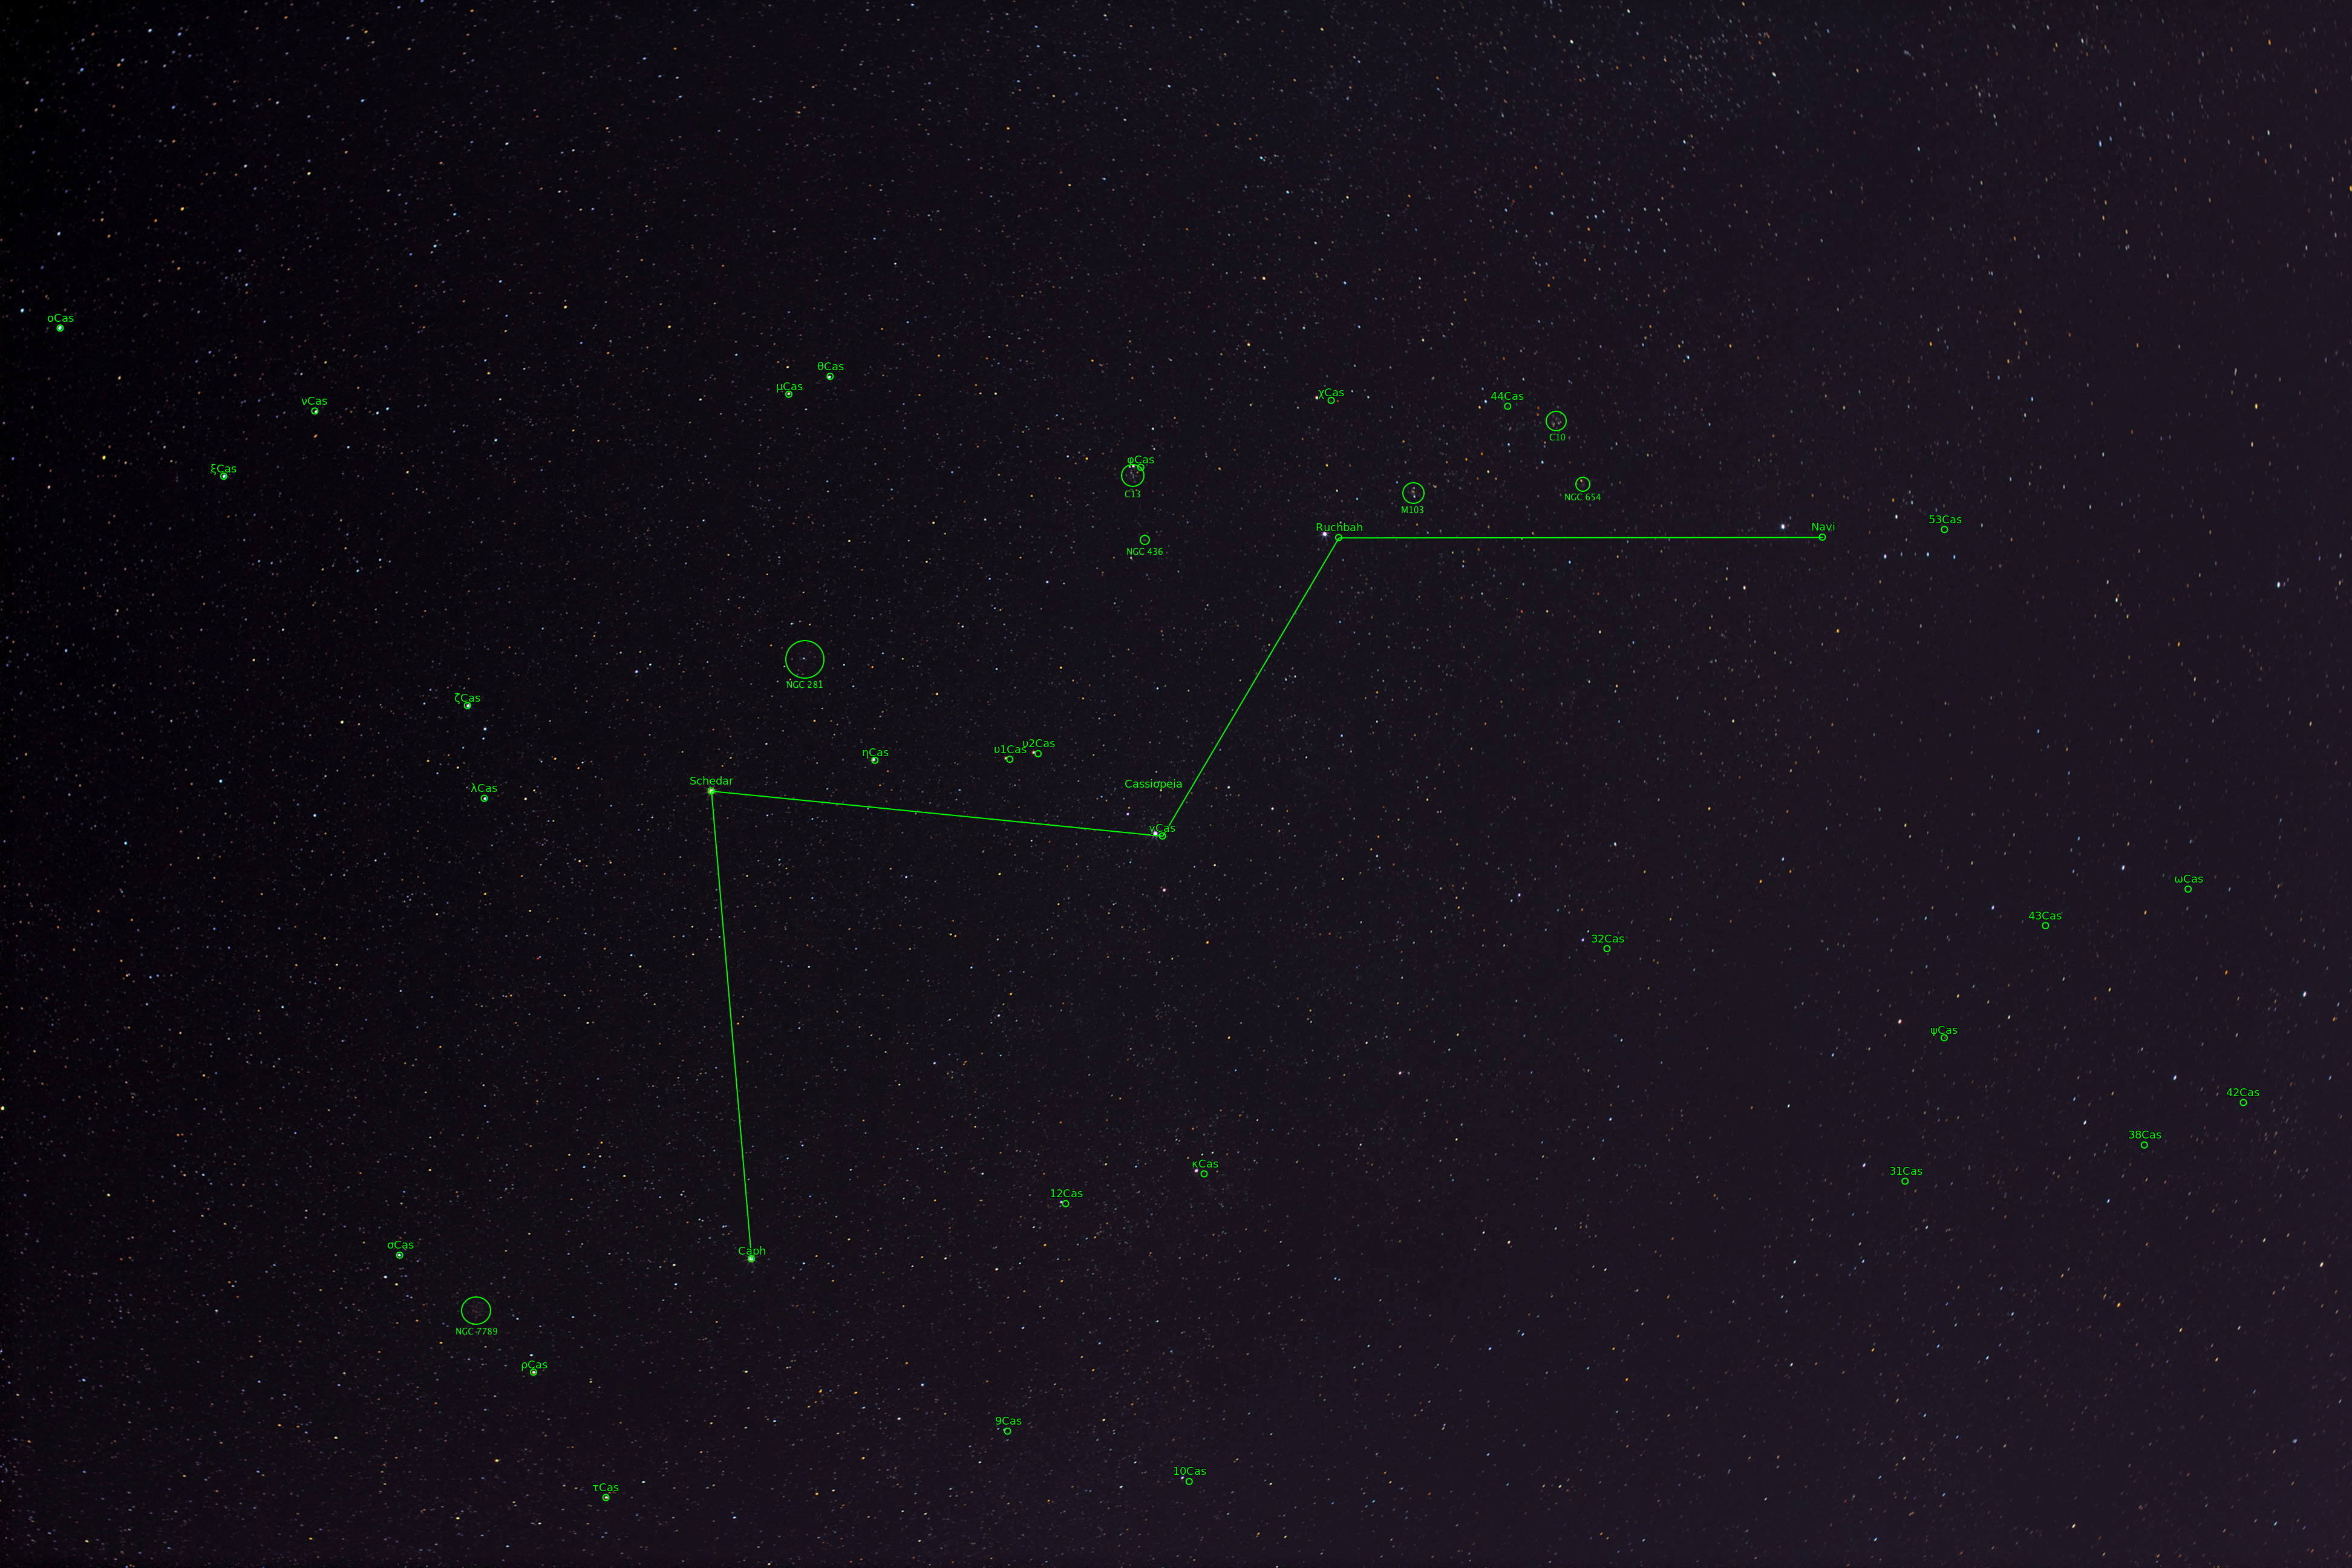
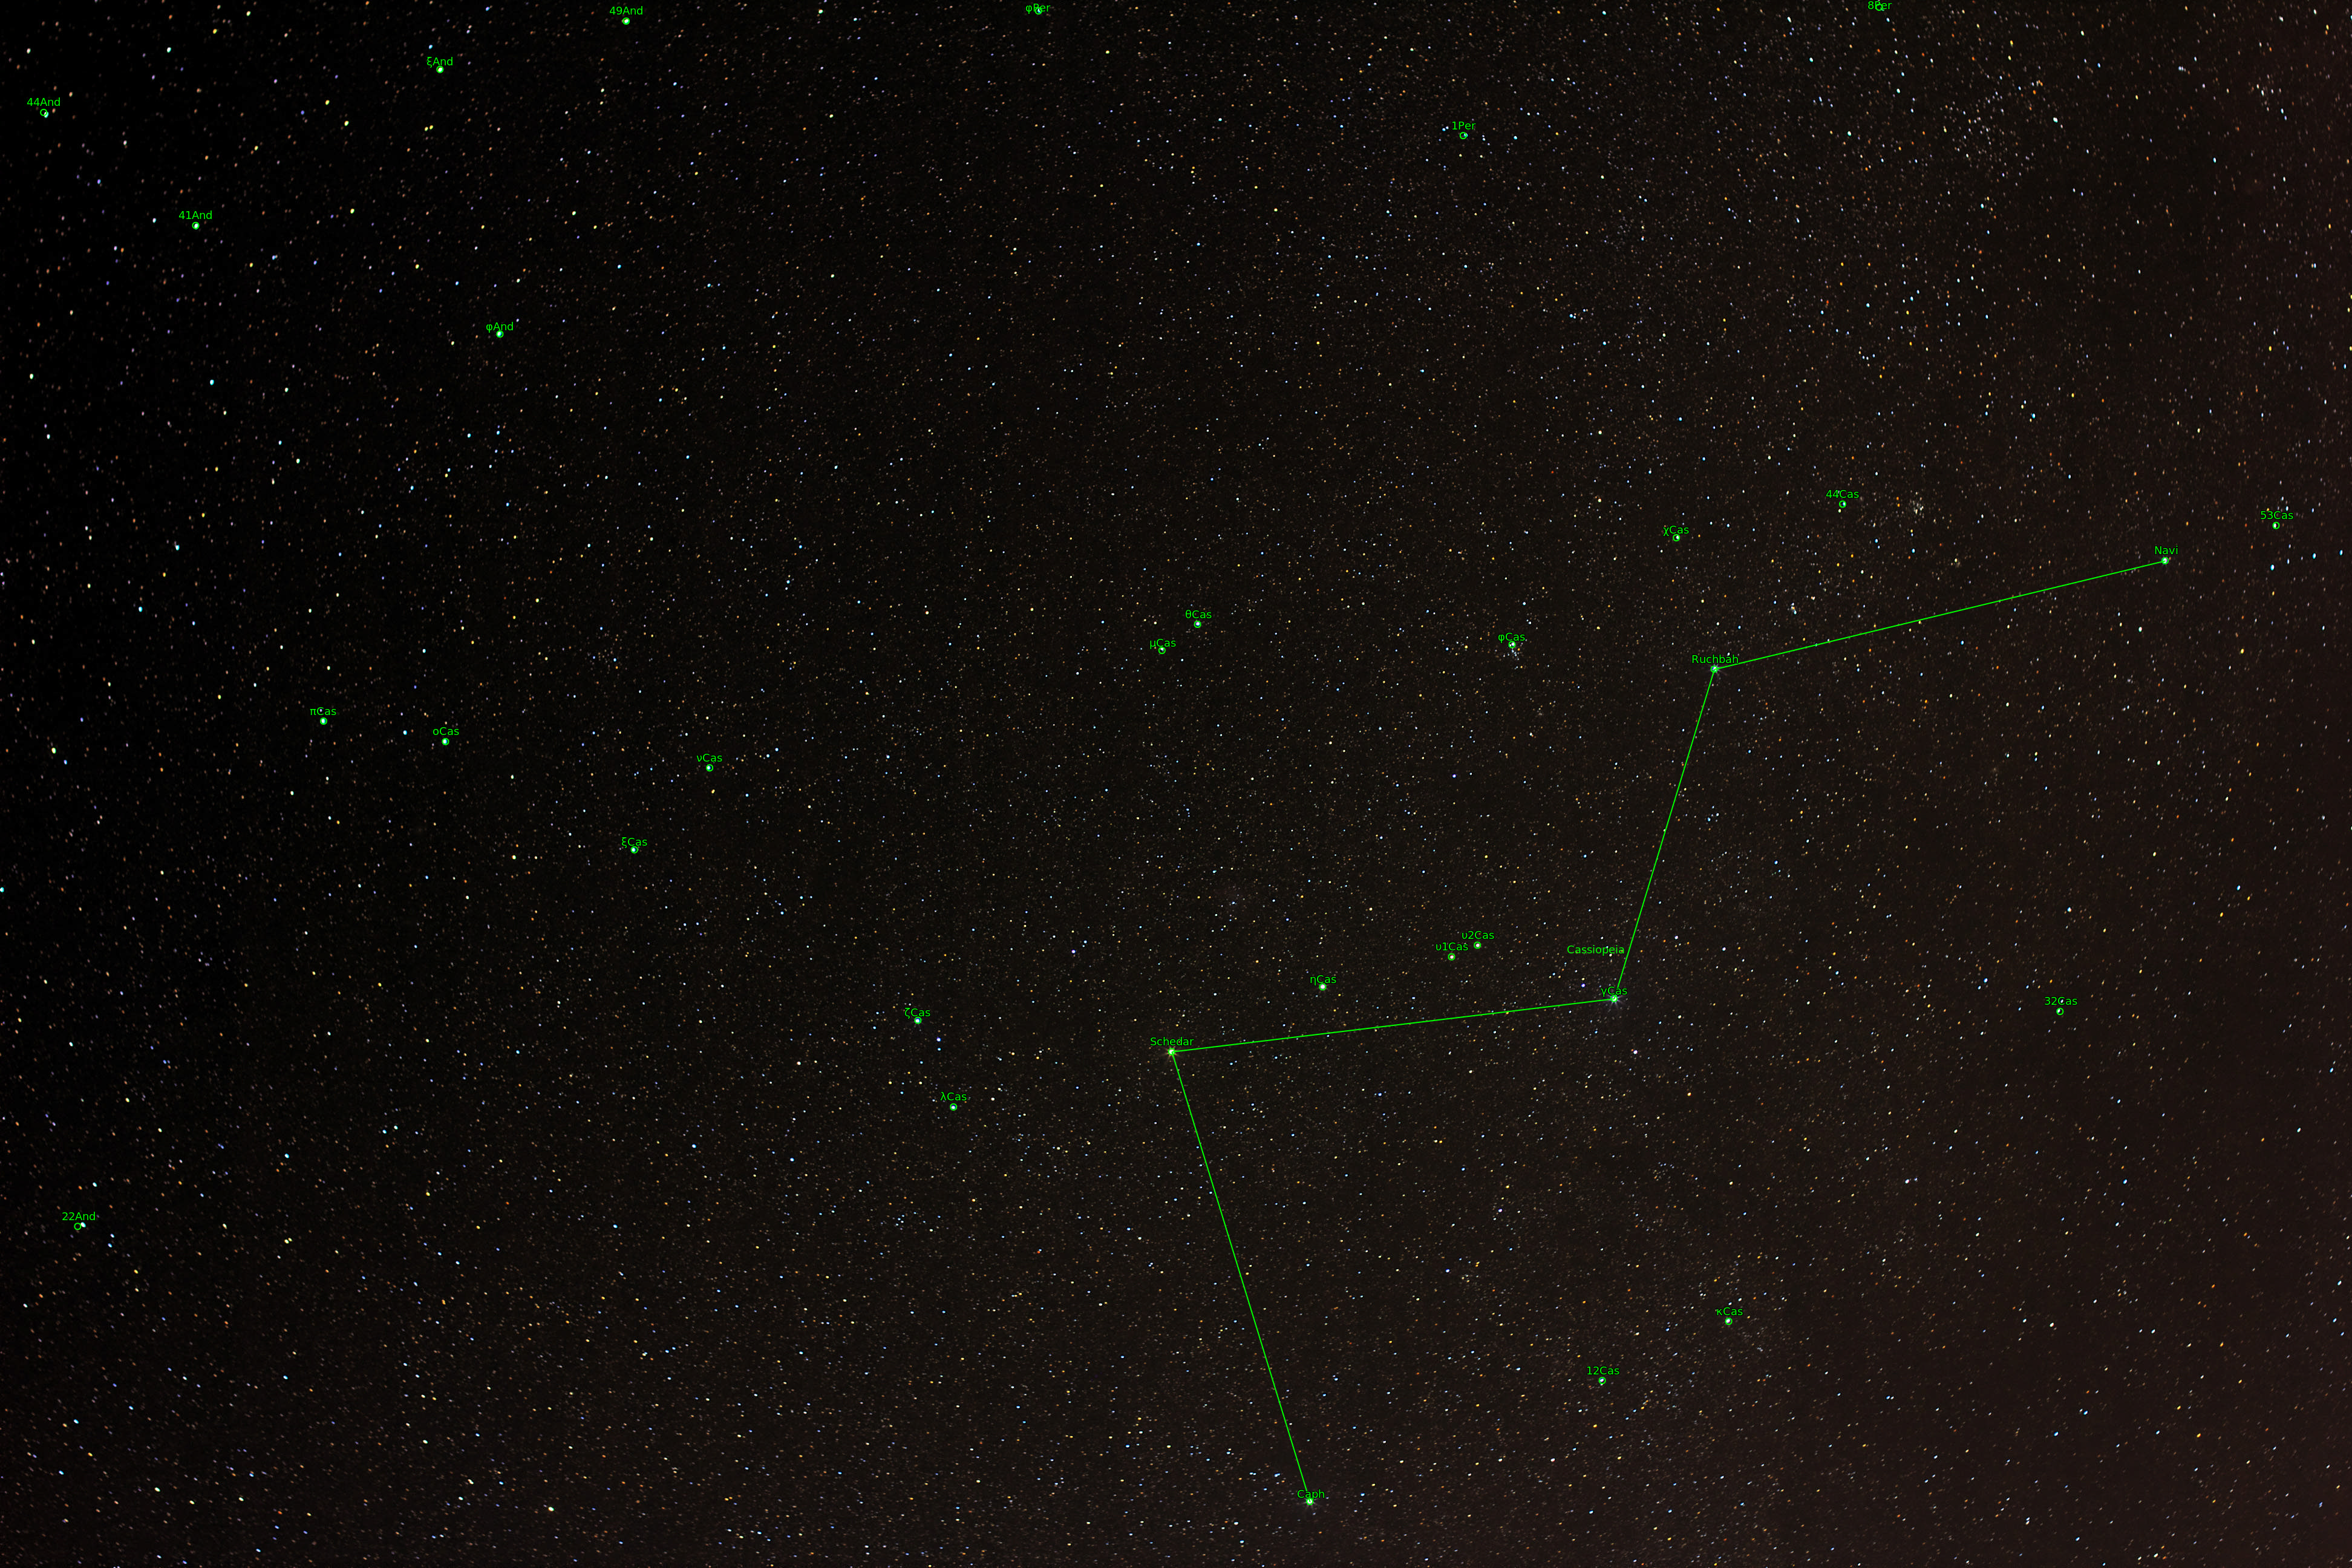
- 2014.12.07: Cassiopeia (annotated), EOS 60D, 50mm lens, f/5.6, 32x 90s, ISO 200
- 2014.12.14: Cassiopeia (annotated), EOS 60D, 50mm lens, f/5.6, 28x 90s, ISO 200
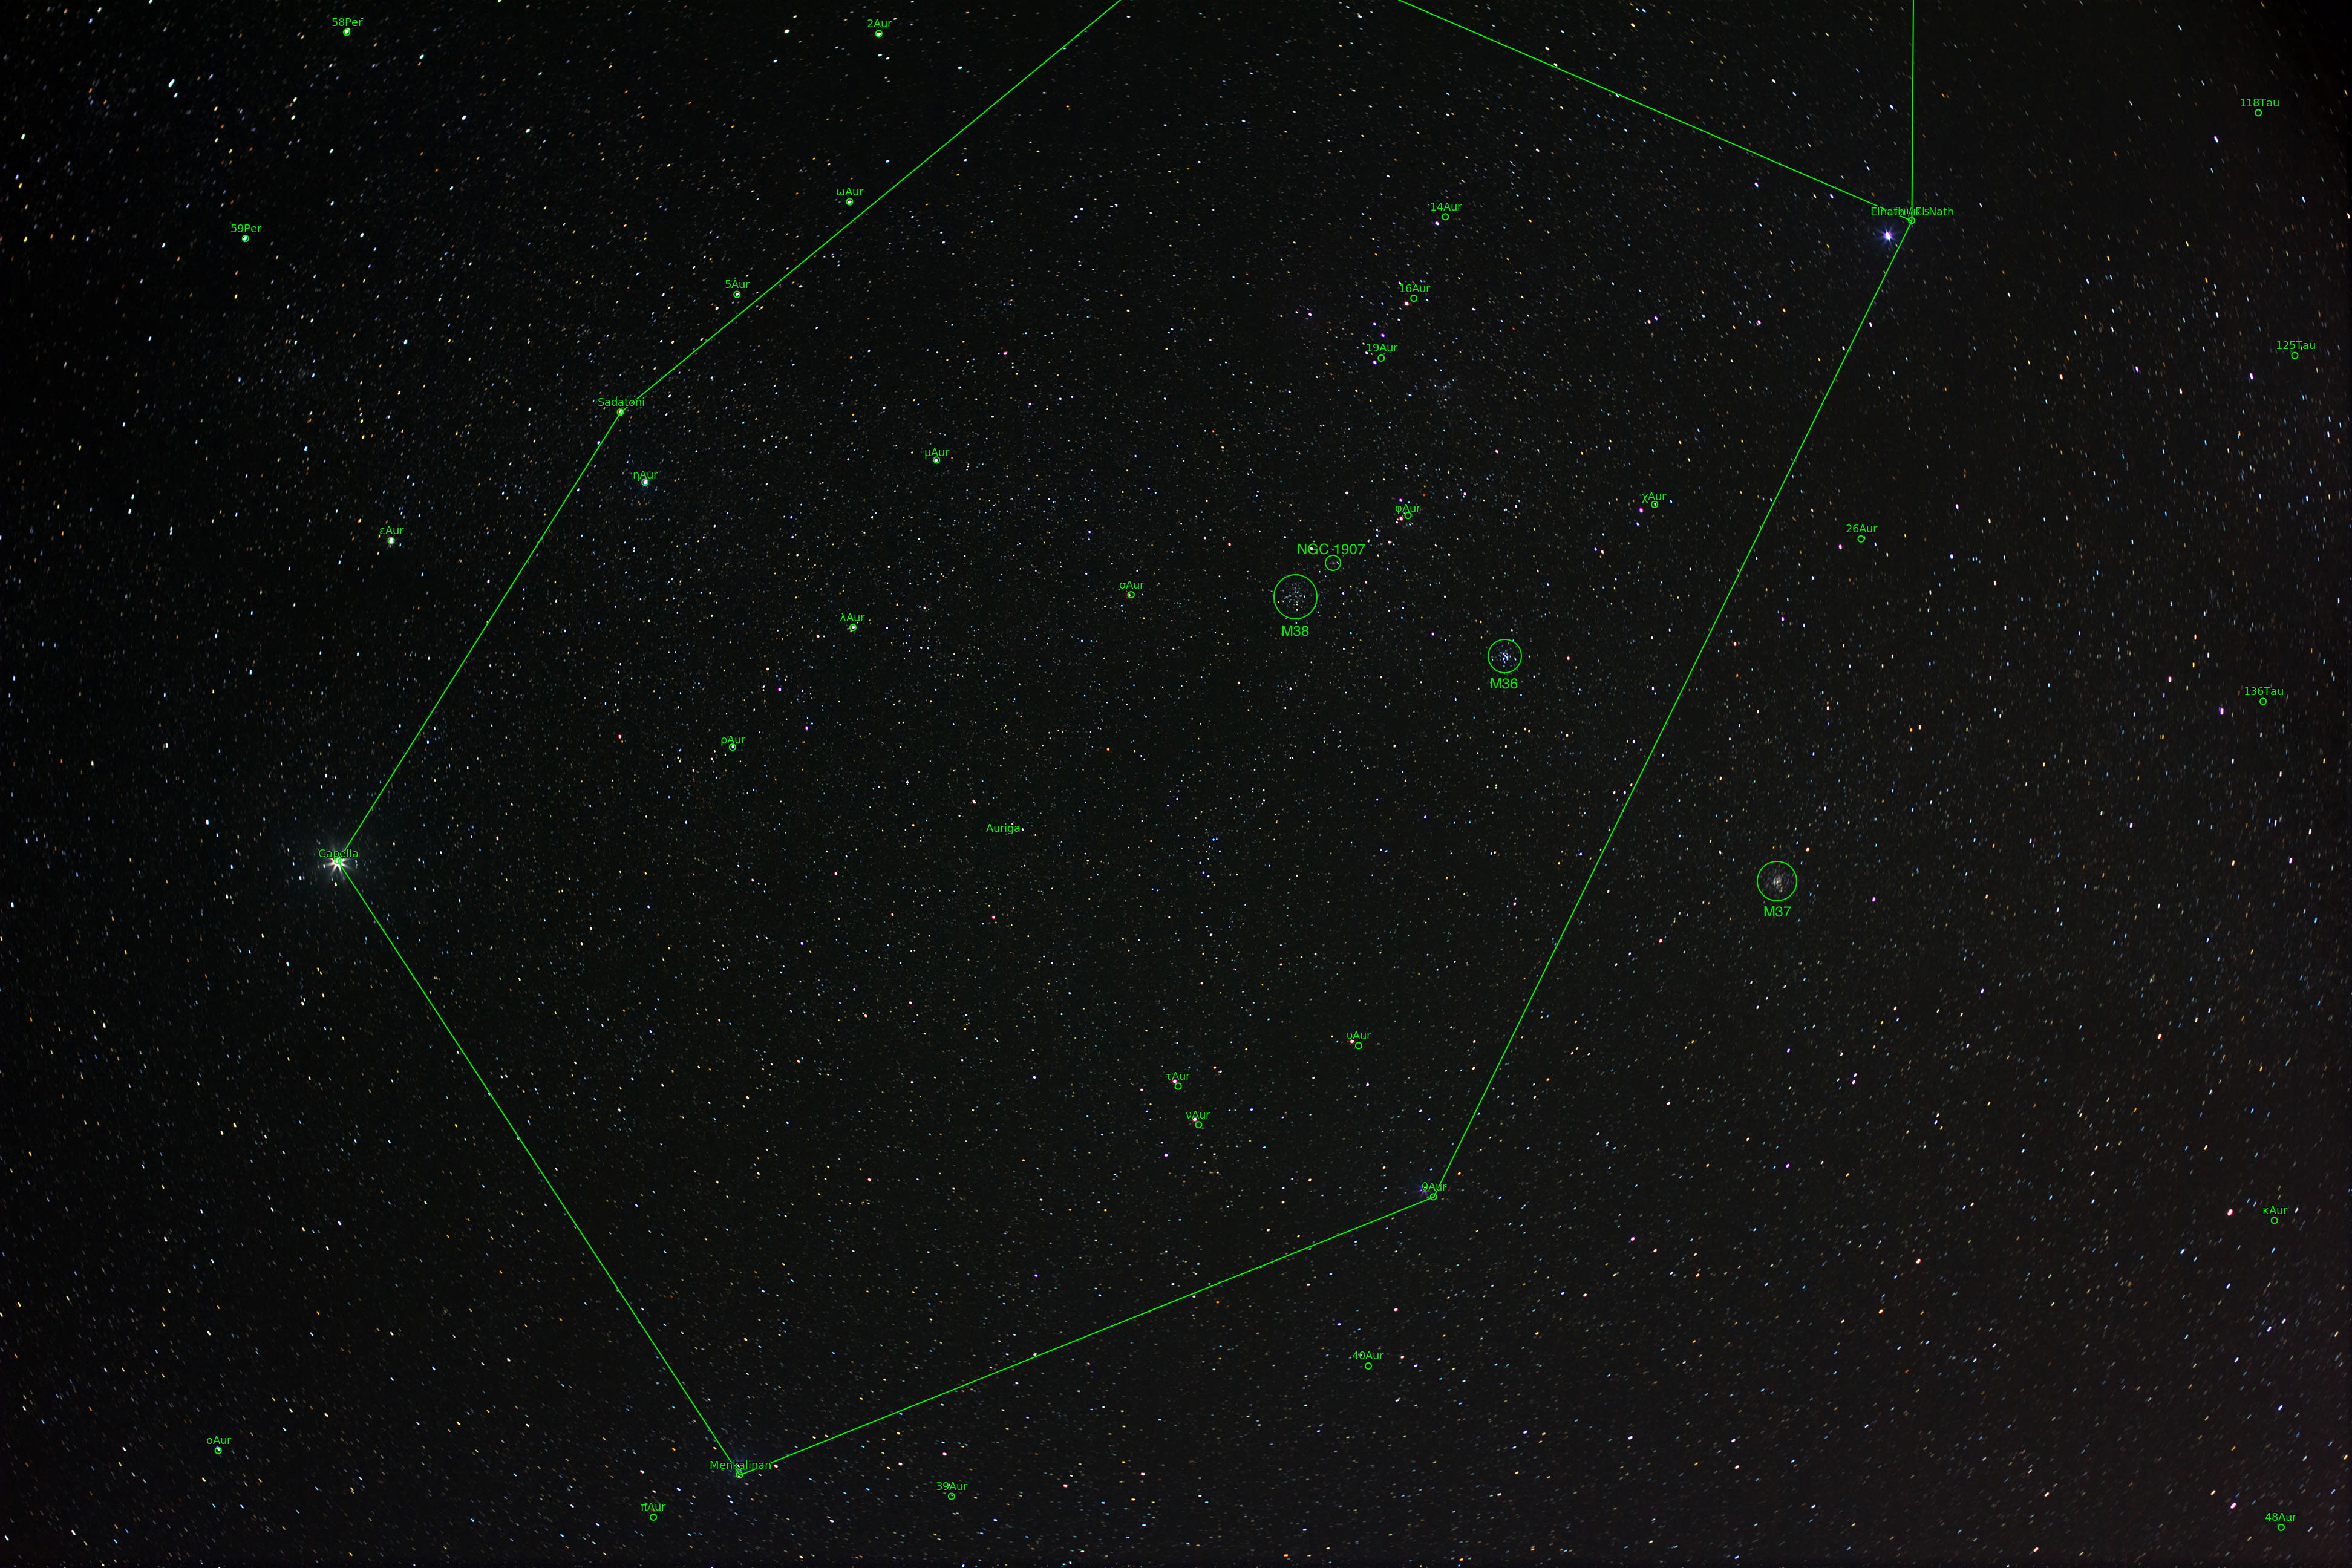
- 2014.12.14: Auriga (annotated), EOS 60D, 50mm lens, f/5.6, 32x 90s, ISO 200
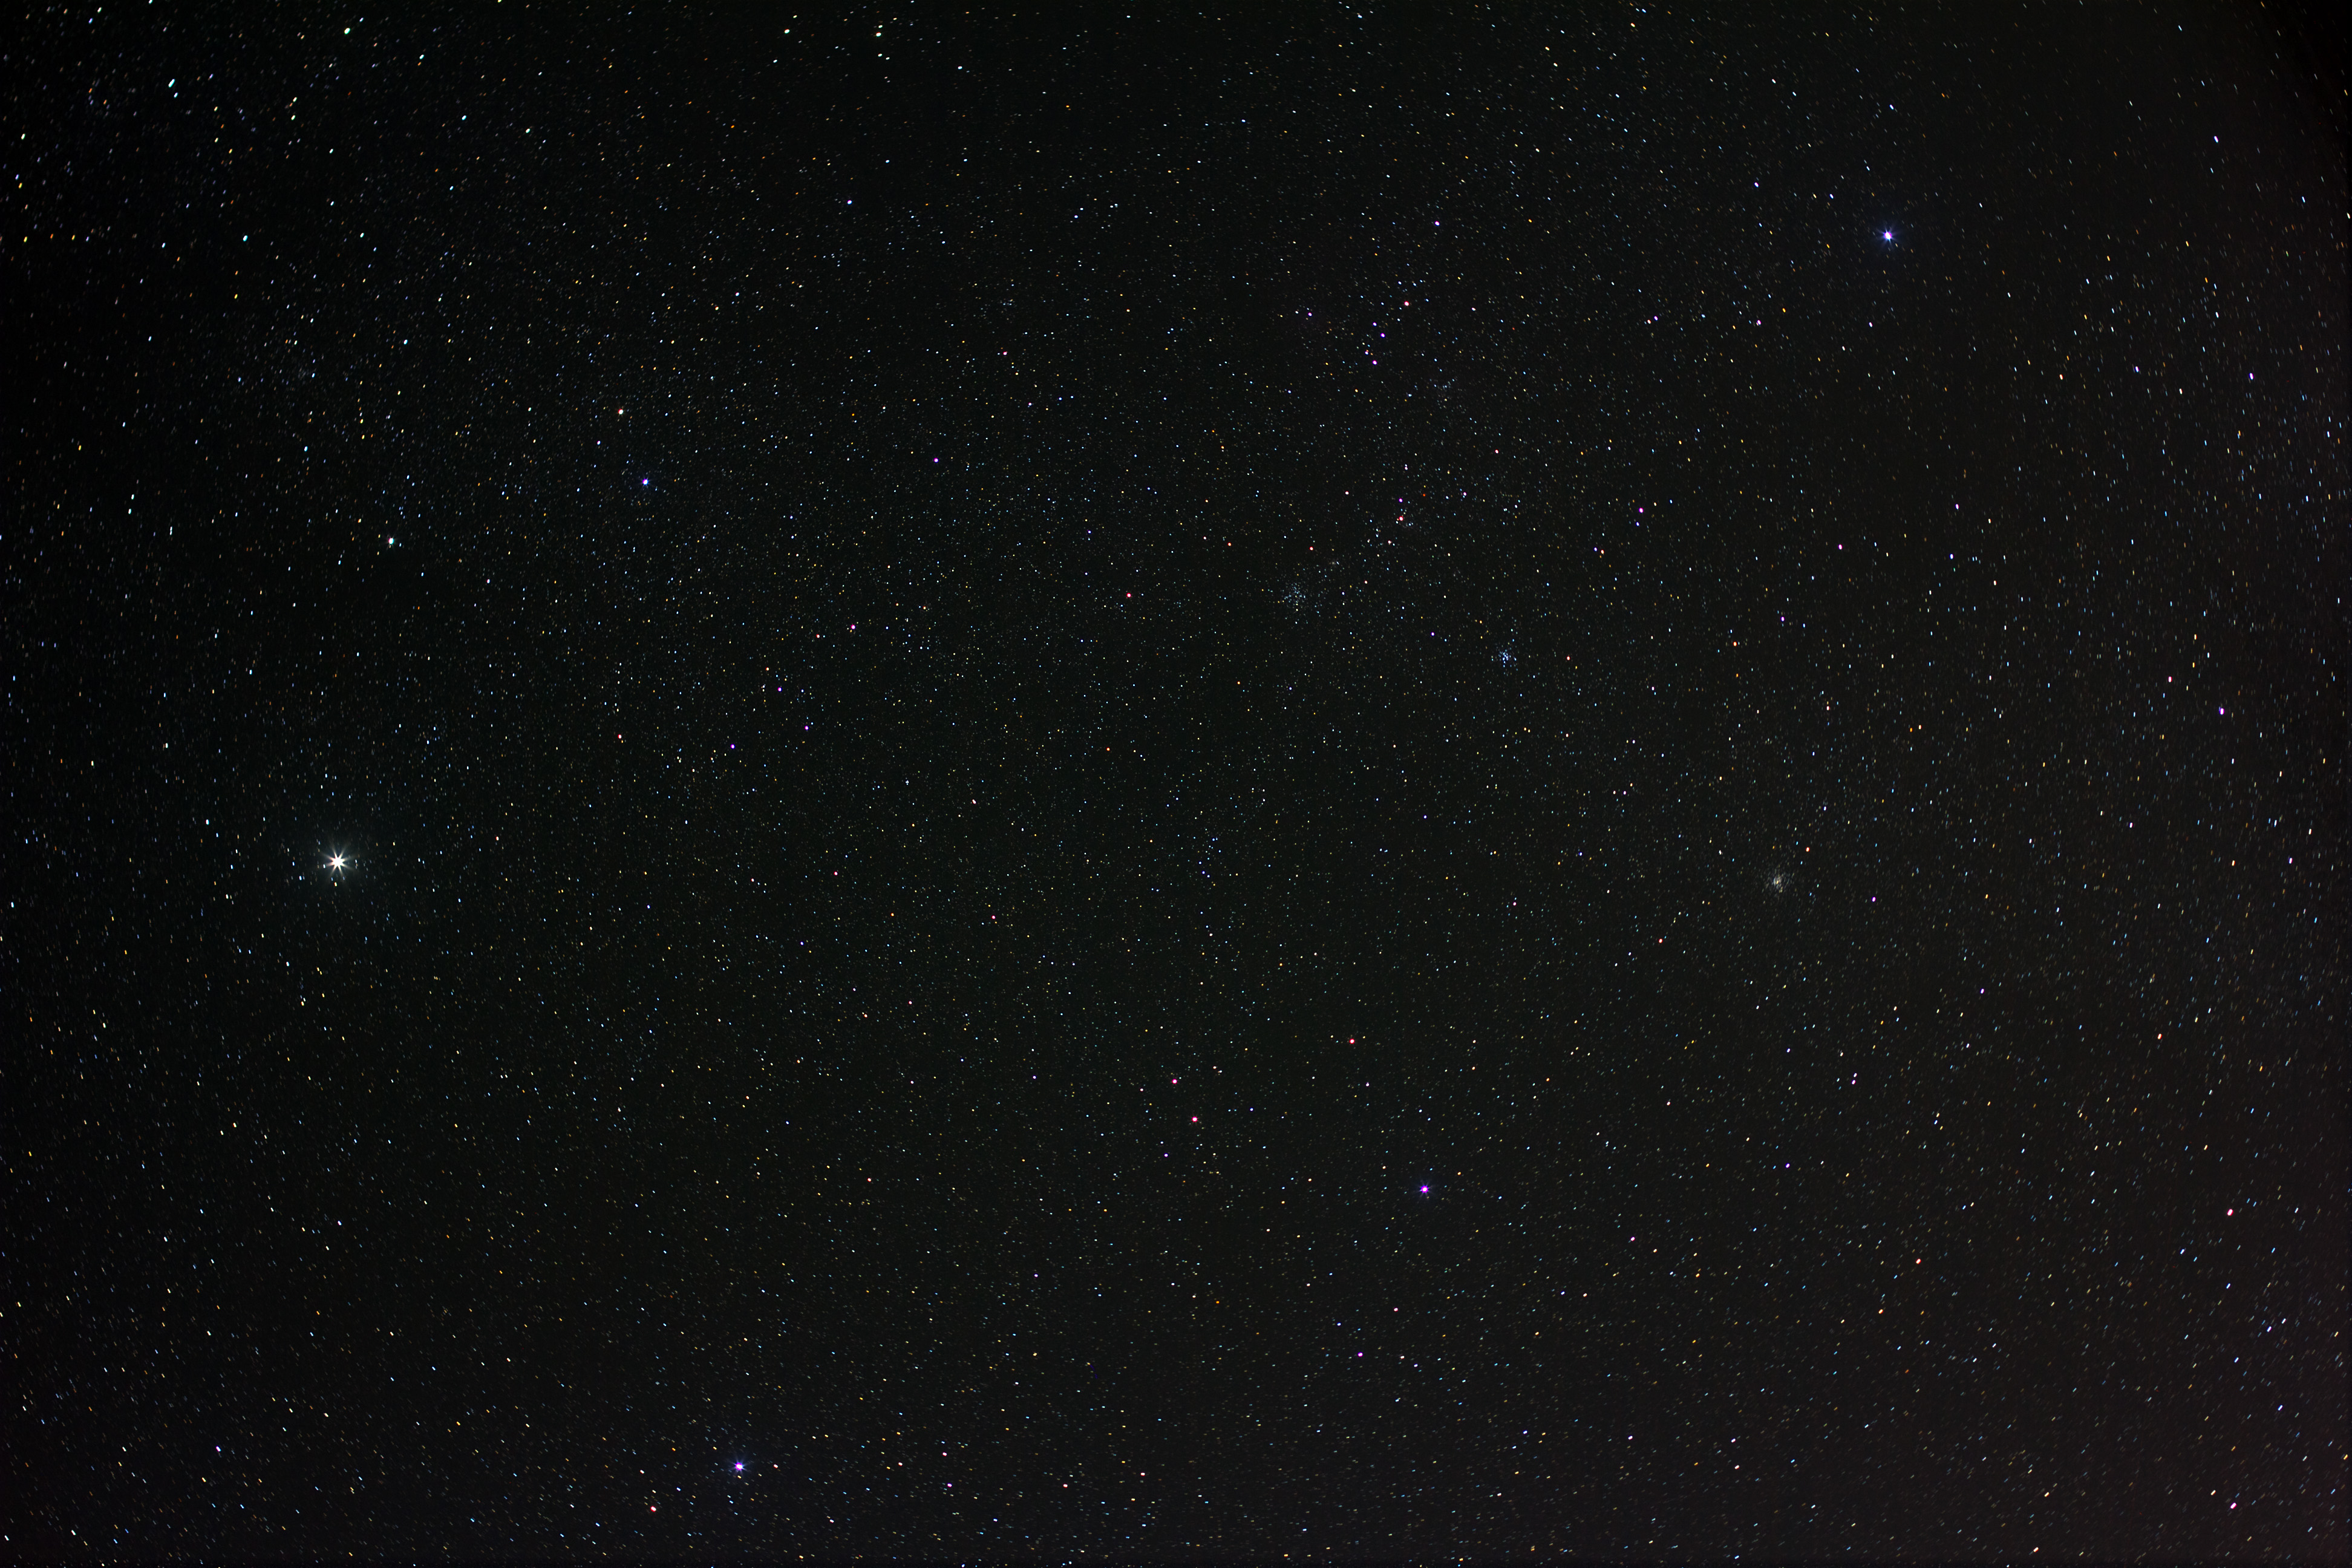
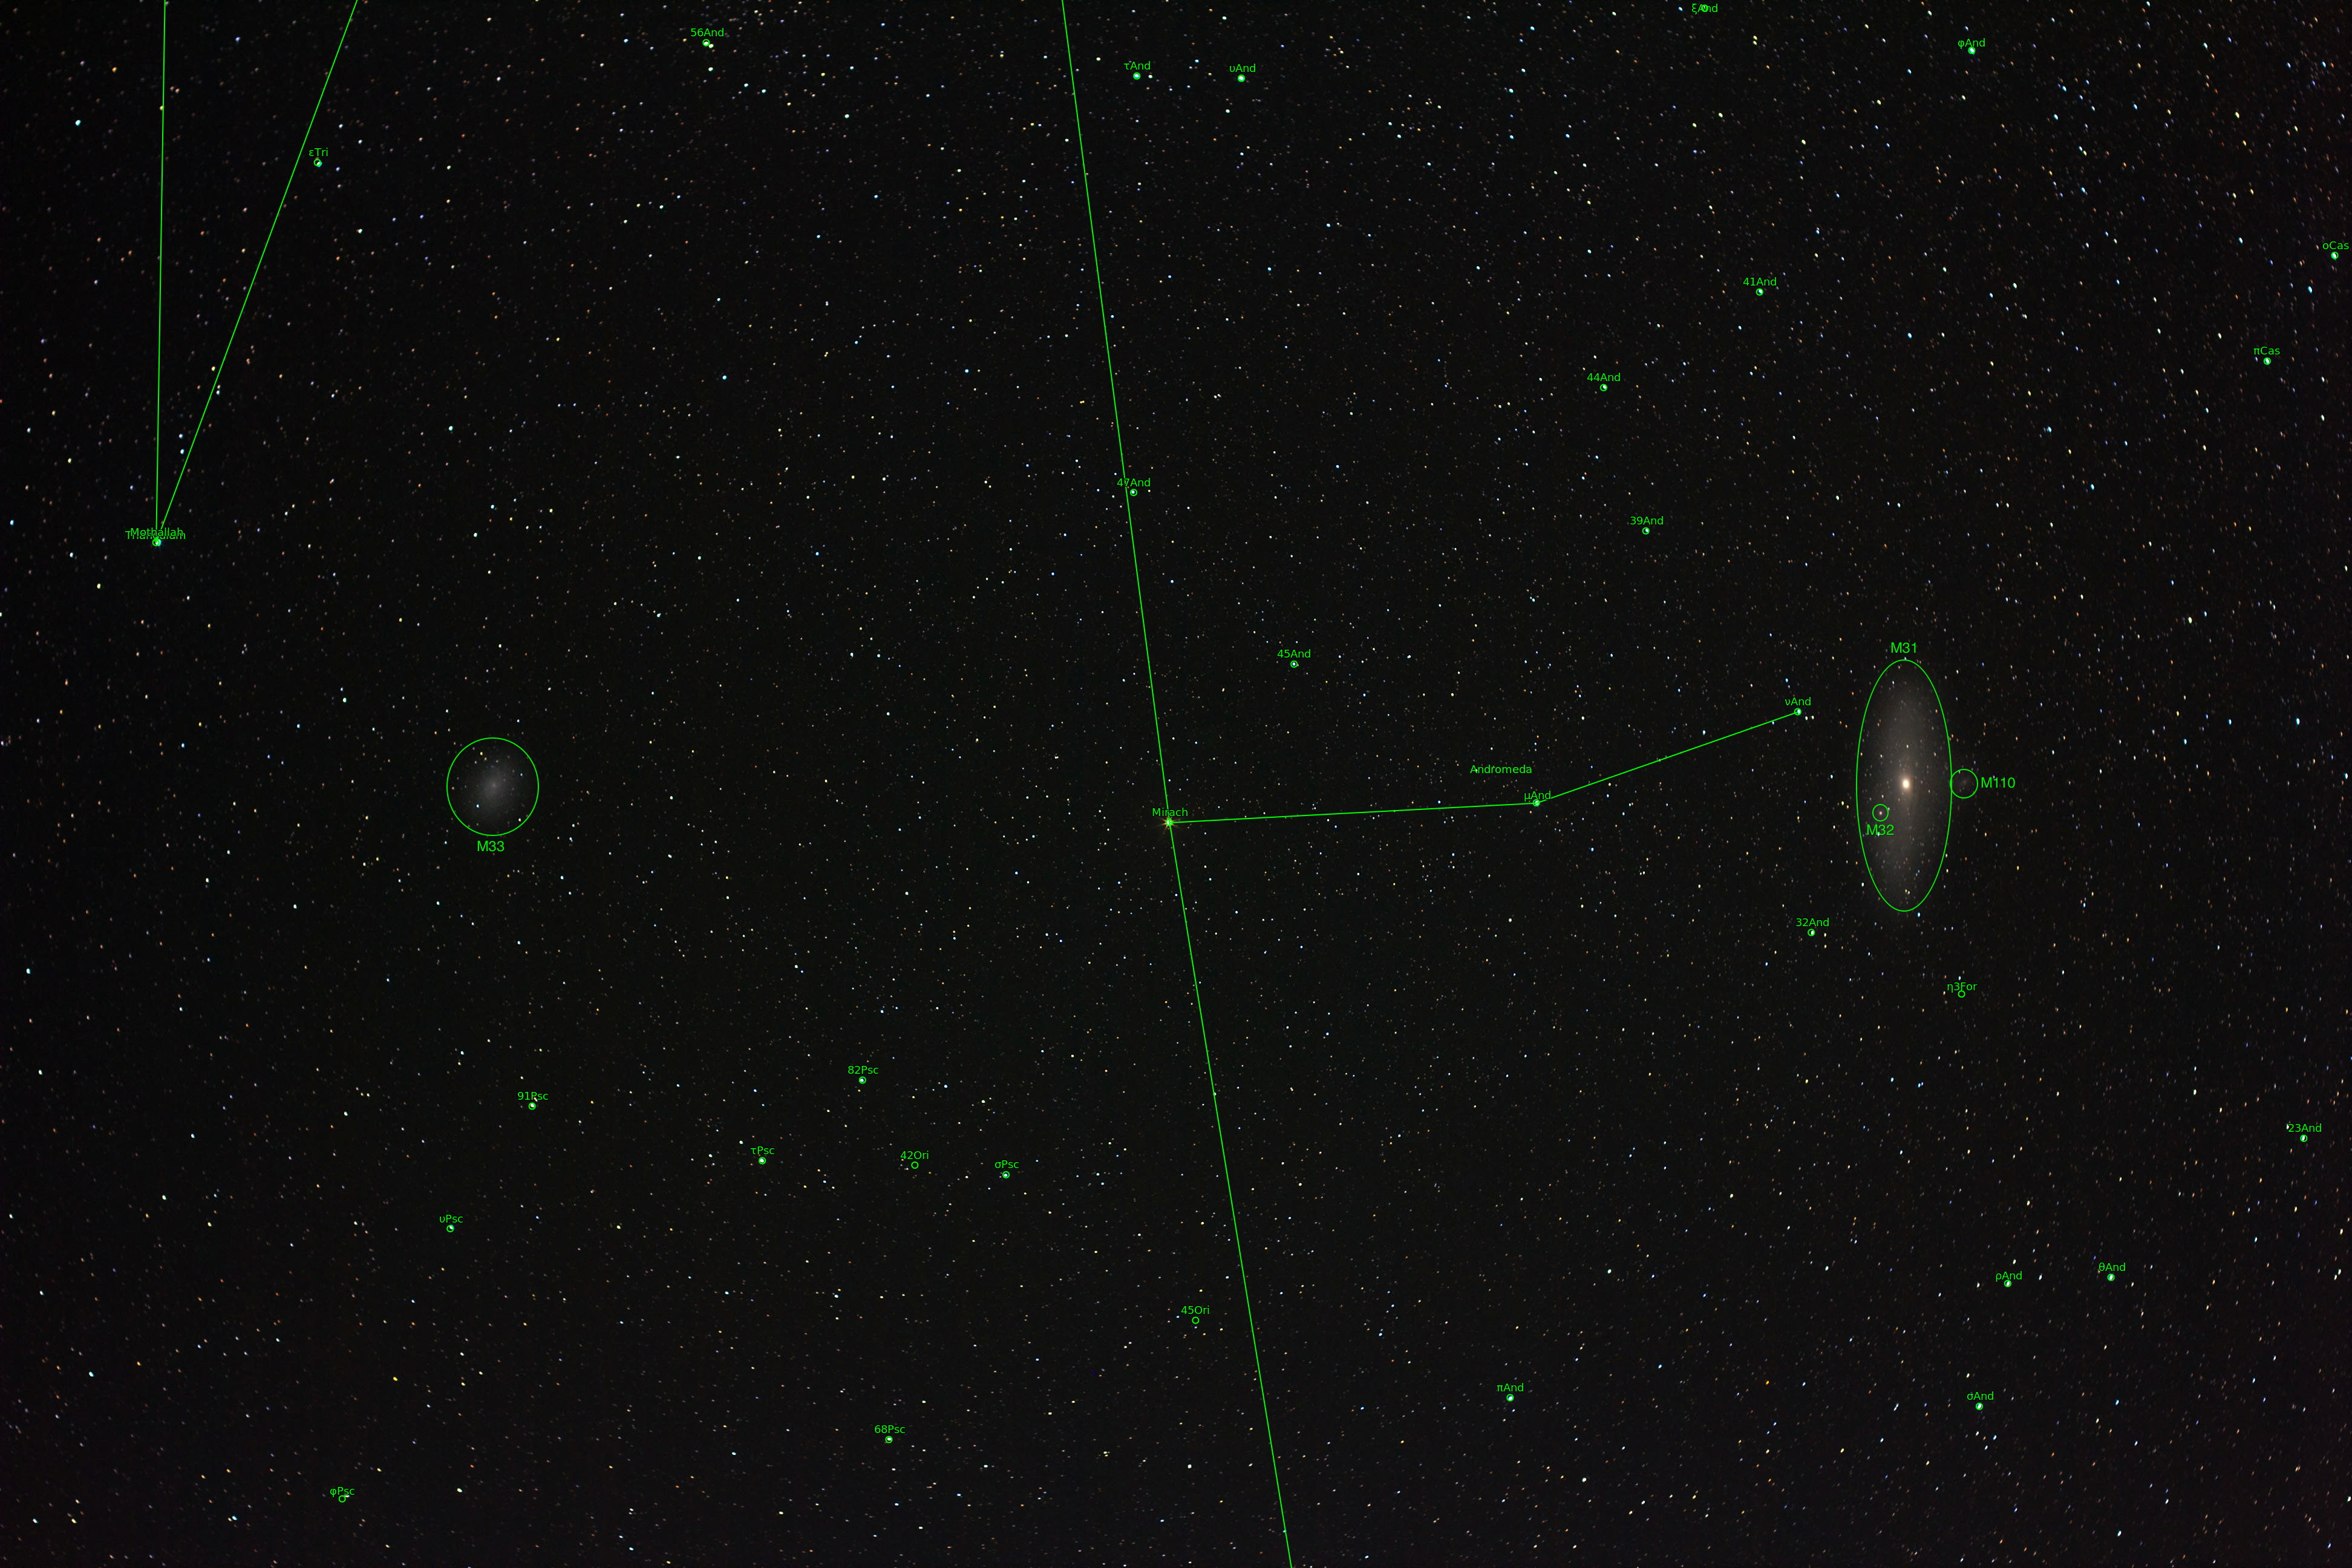
- 2014.12.15: M31 & M33 (annotated), EOS 60D, 50mm lens, f/5.6, 23x 90s, ISO 200
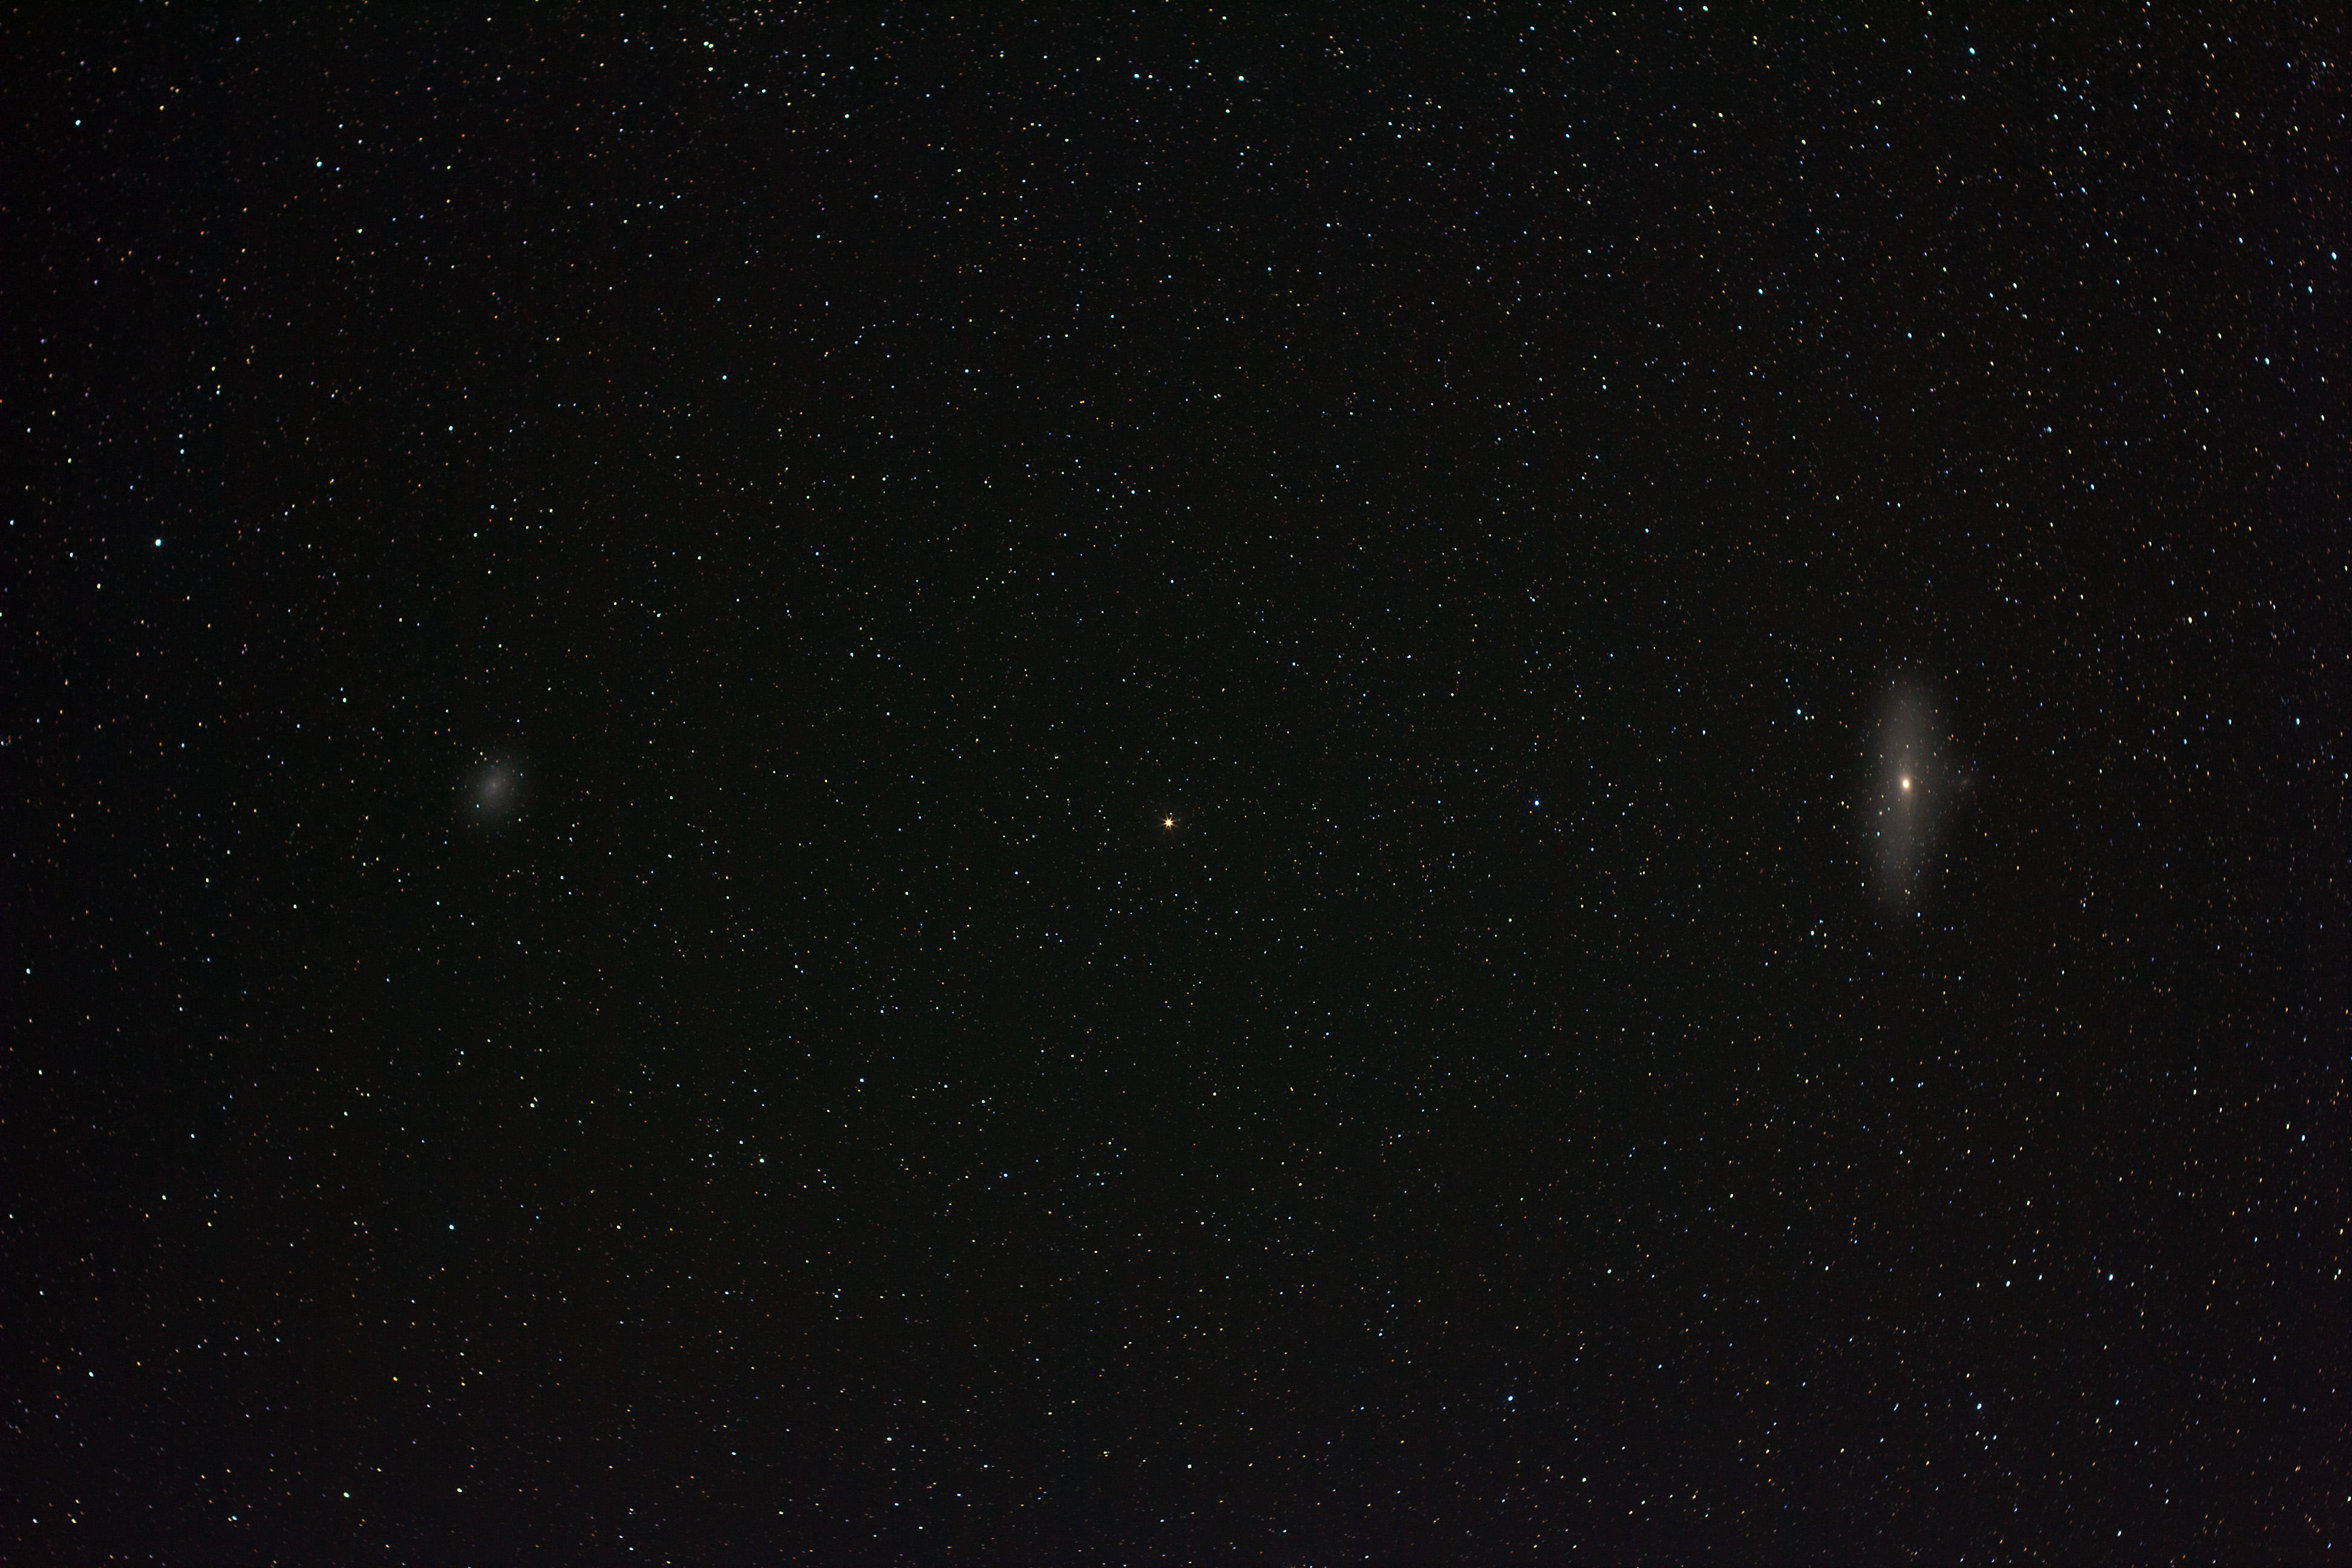
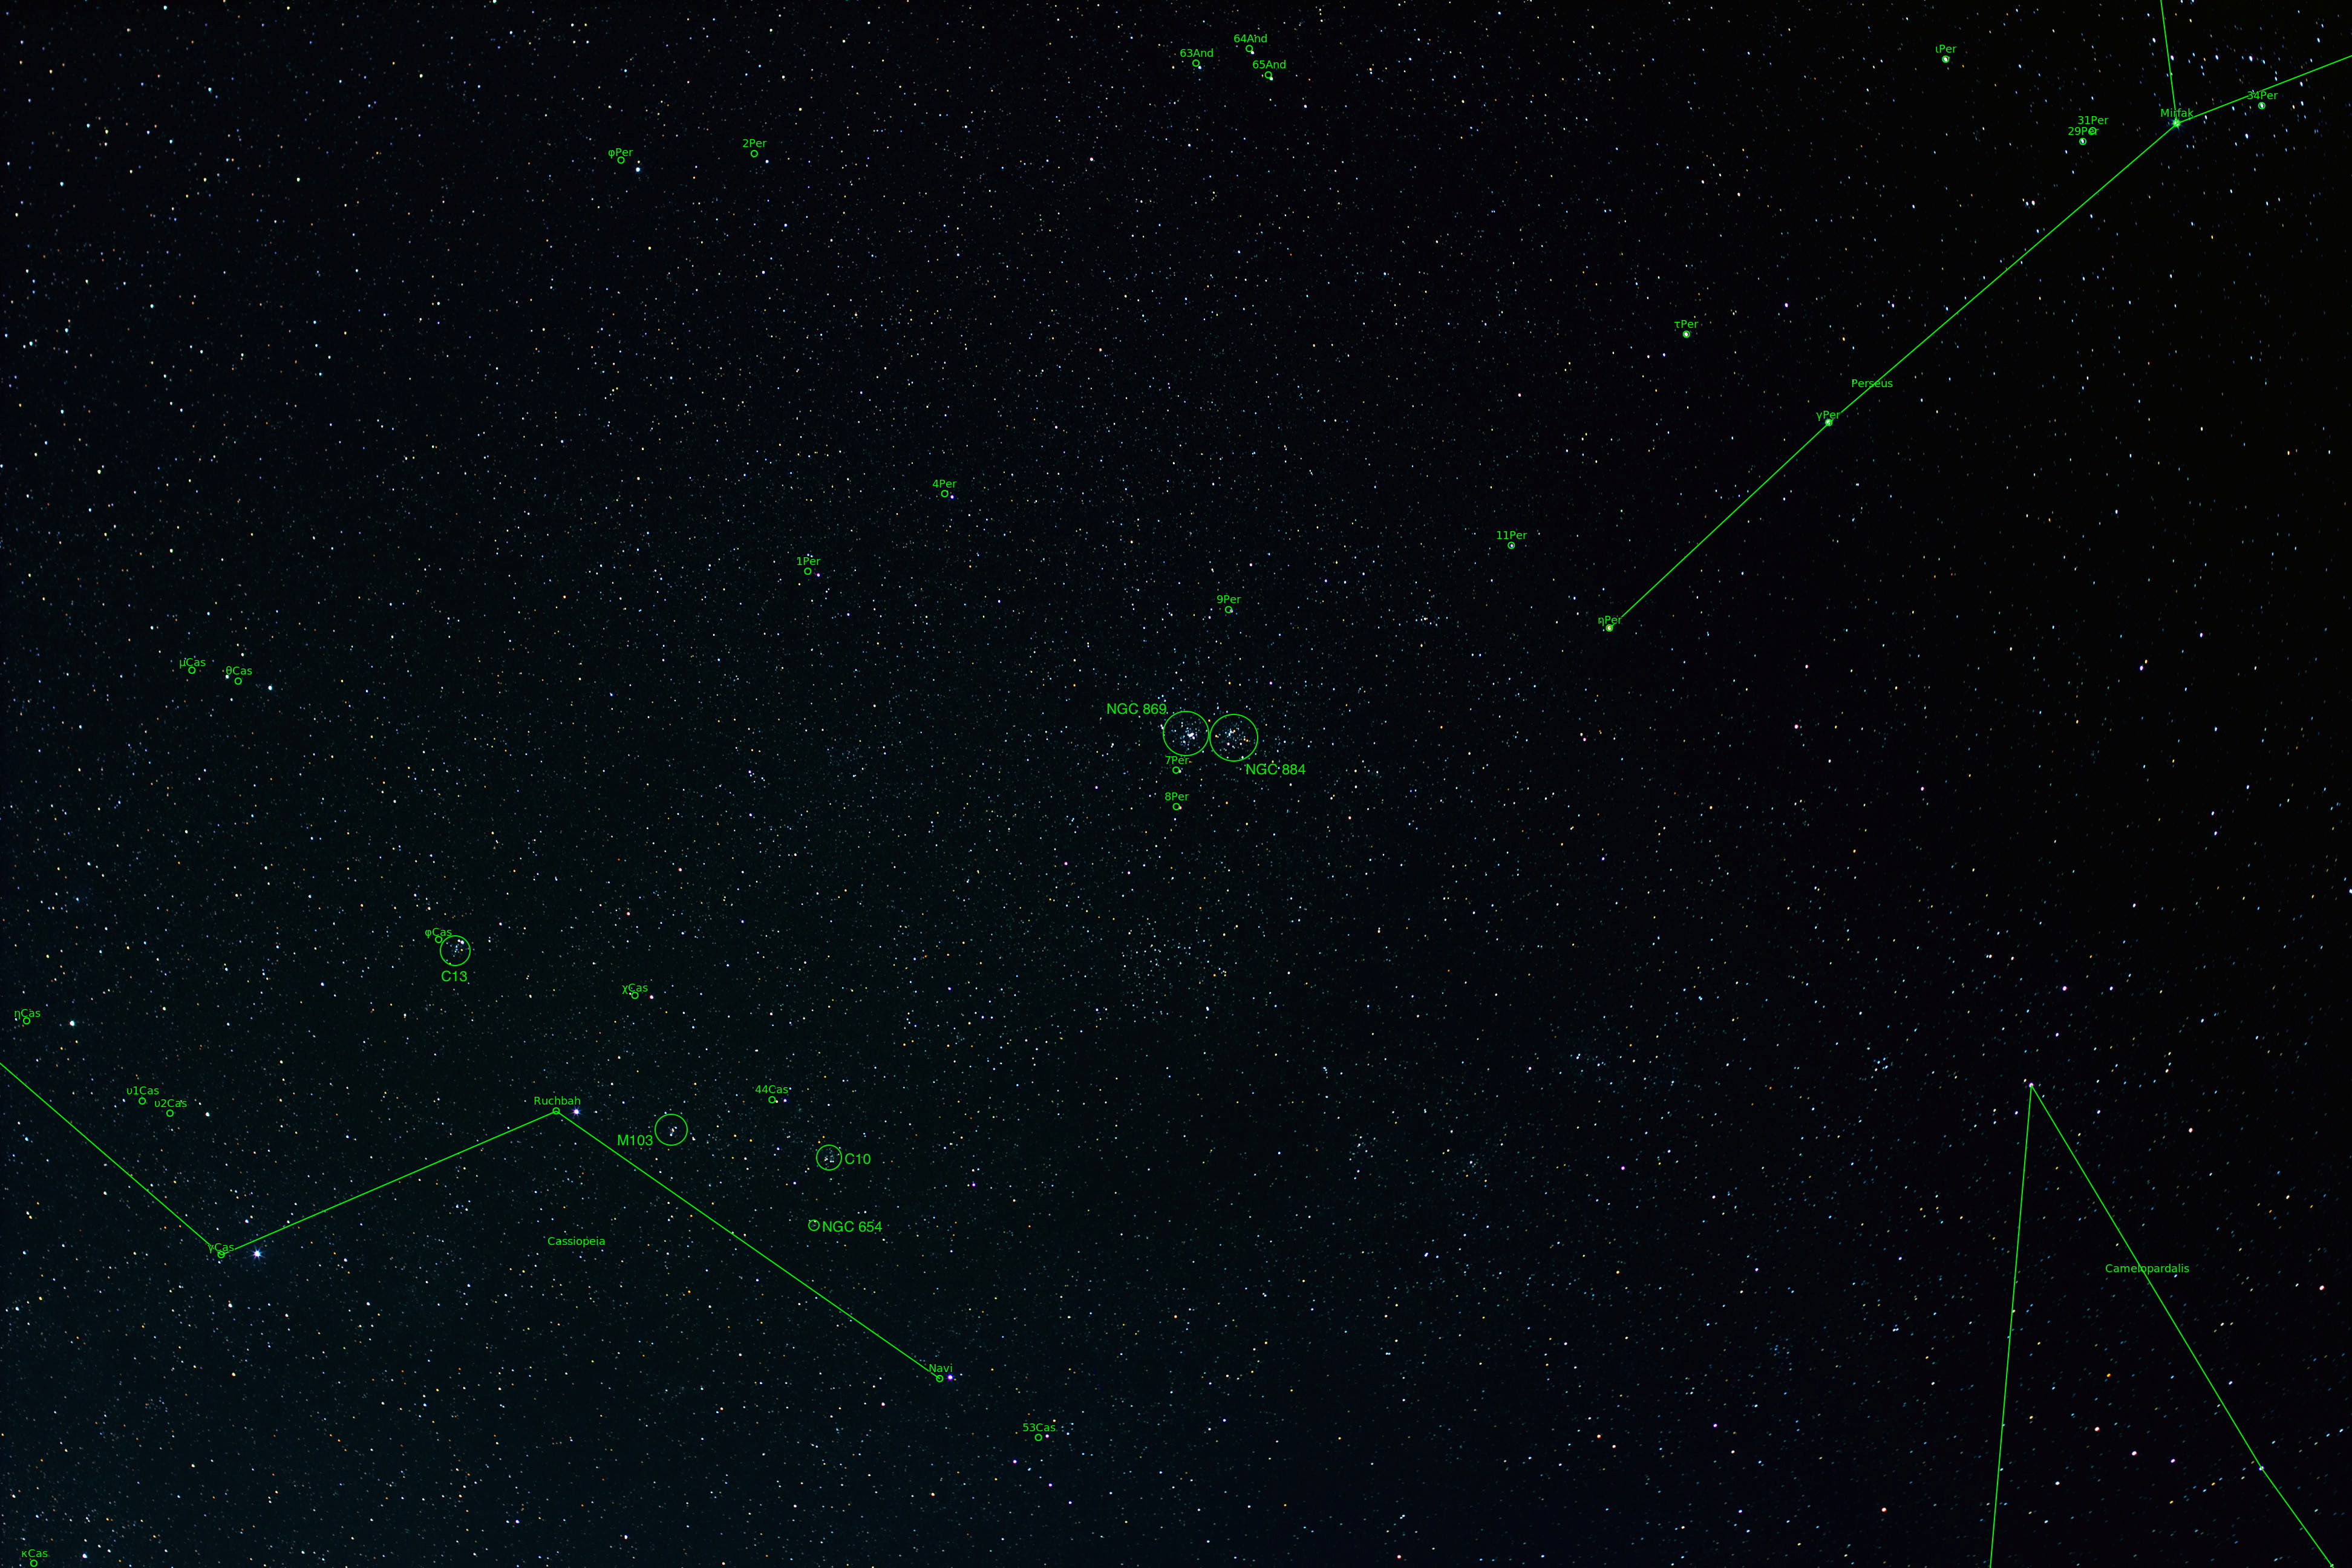
- 2014.12.19: Double Cluster (annotated), EOS 60D, 50mm lens, f/4.5, 33x 120s, ISO 200
- 2015.01.13: C/2014 Q2 & M45, EOS 60D, 50mm lens, f/4.5, 24x 90s, ISO 200, bad light pollution
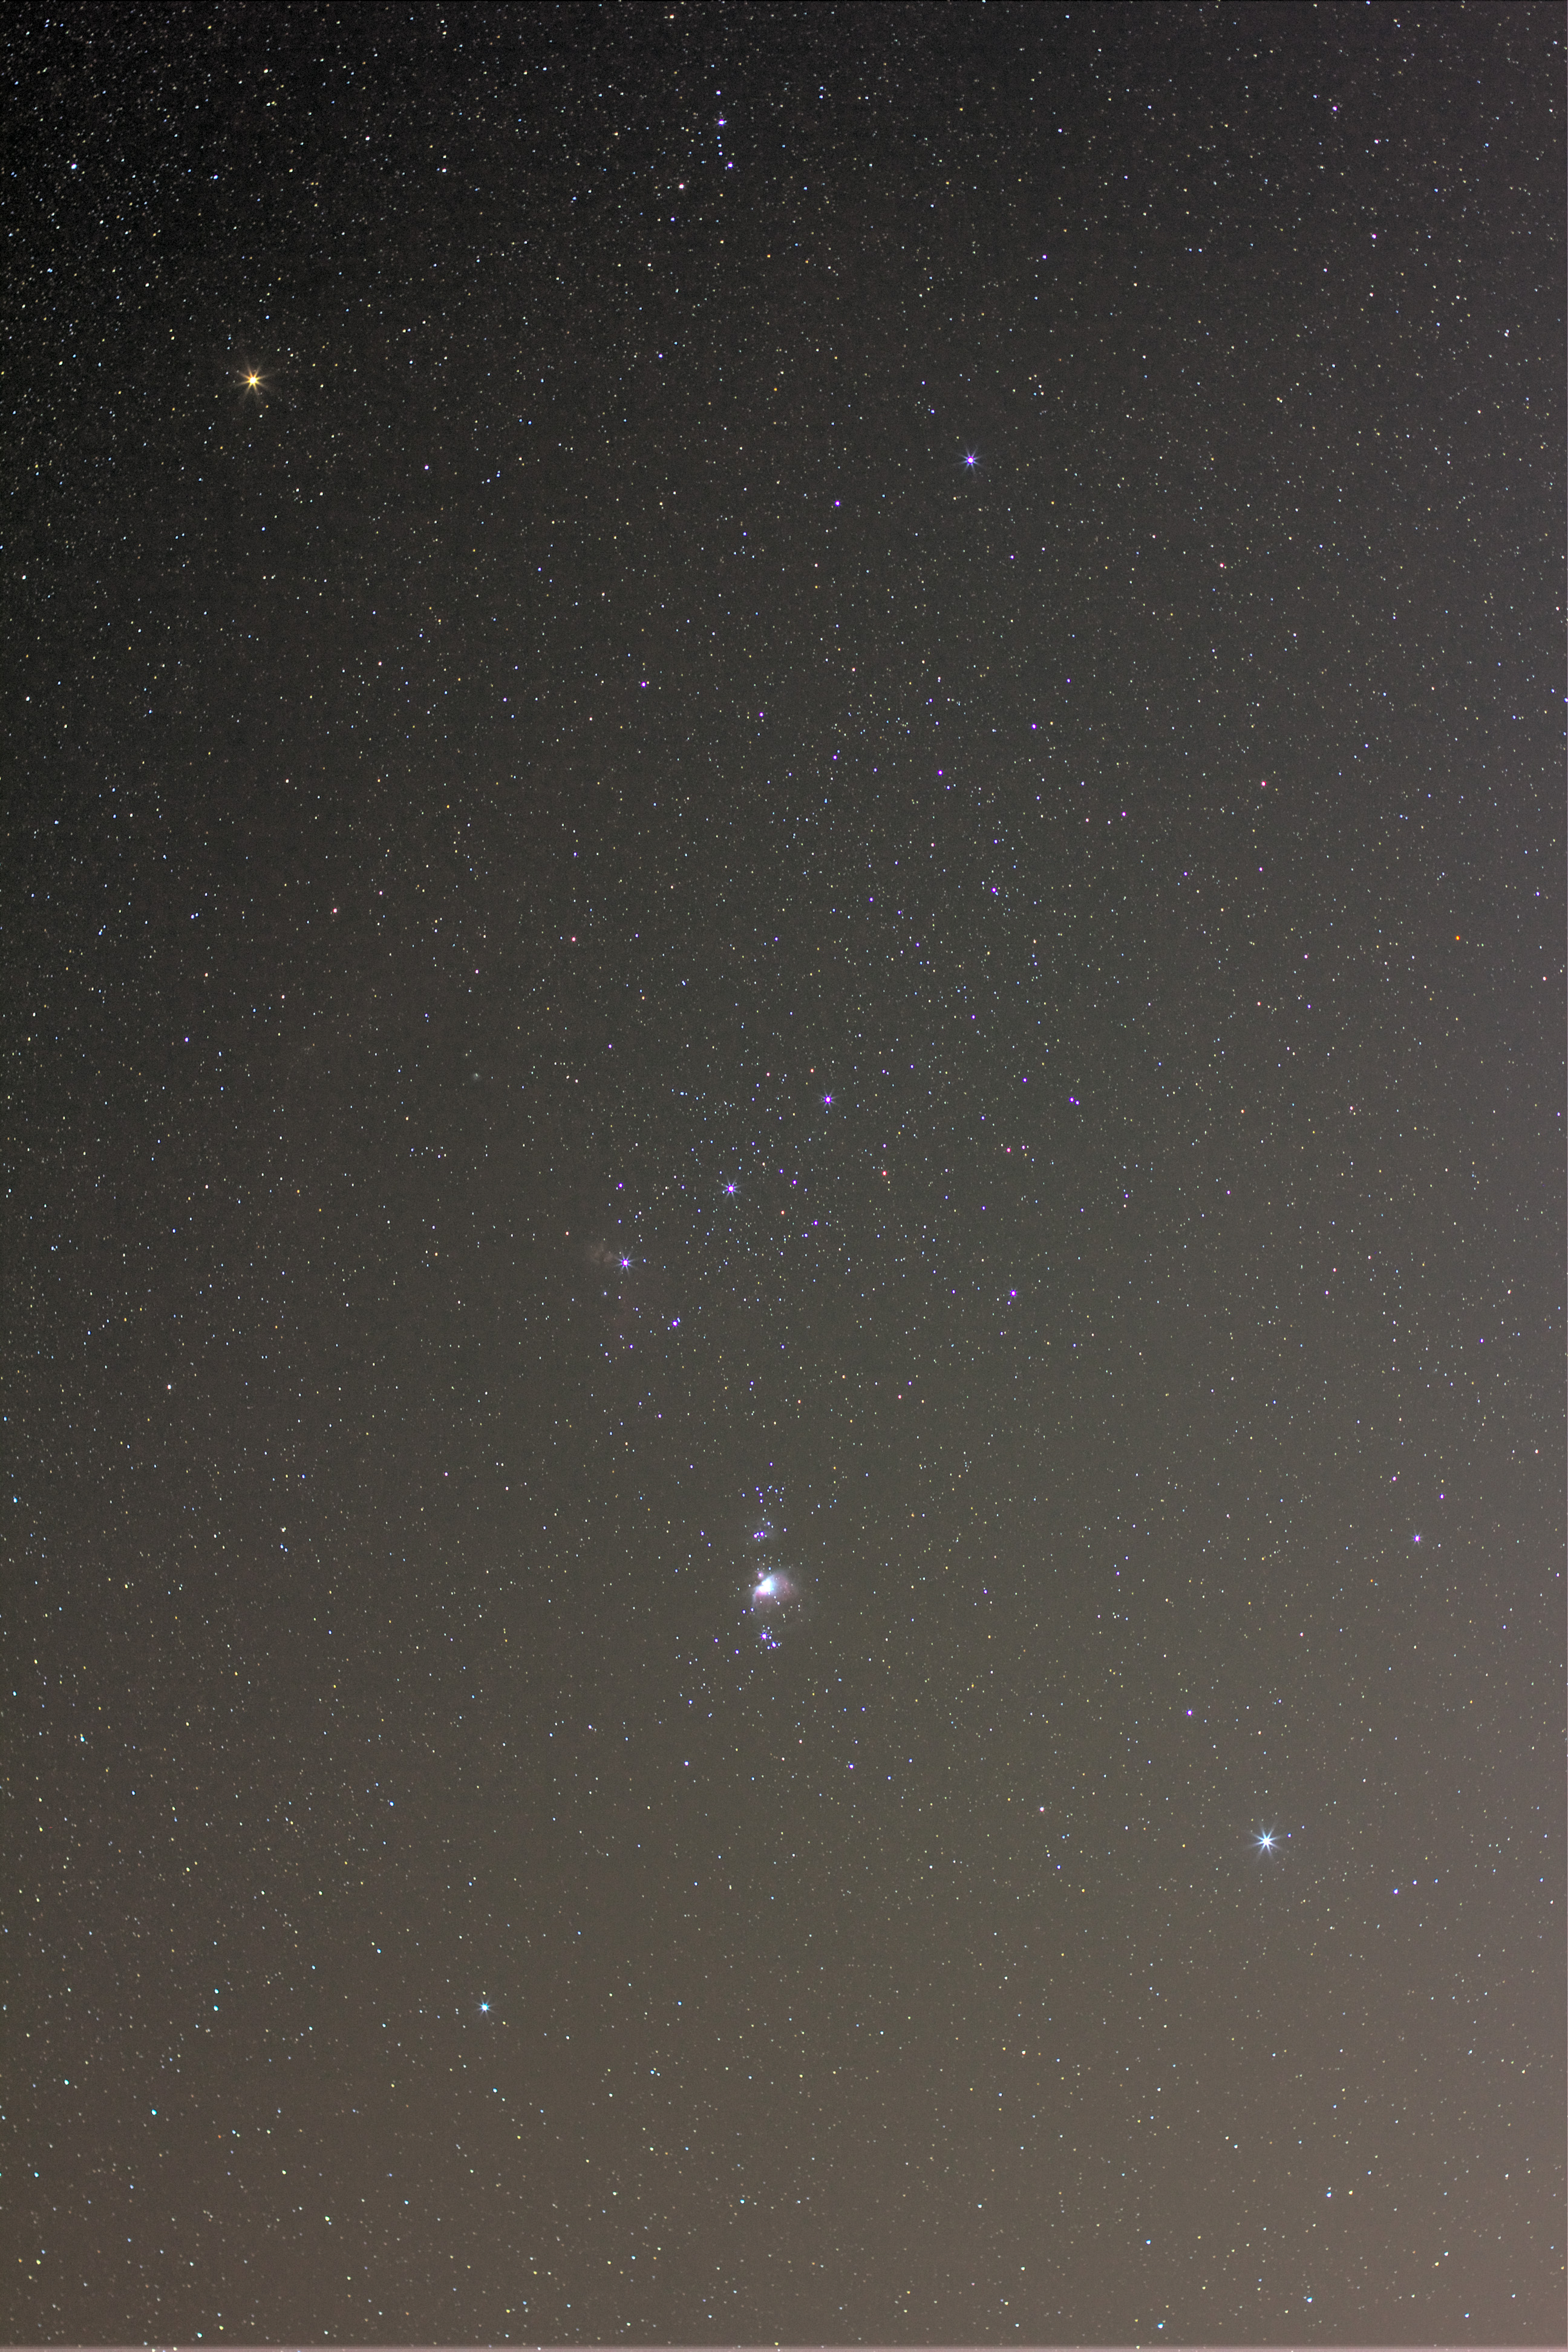
- 2015.01.13: Orion, EOS 60D, 50mm lens, f/4.5, 7x 90s, ISO 200, bad light pollution
Verdict
I like it. I wouldn't recommend it if you're new to astrophotography and don't know what you're doing yet, but it makes a good travel mount, for those times when you're only going to be at a site for a few hours and don't want to lug all your equipment around, which was my reason for buying it. I won't be using the "Snap" port, but instead will use my own intervalometer to control the camera. I am using the Astro-Physics PolarAlign app to help me with polar alignments.